![]()
These guides are only released at least one day after the event has launched, because they are based on first-hand experience from testing and beating the fight with different team comps and strategies. And that takes a good amount of time!
If you would like to help support the effort put into creating this content, please consider becoming a patron. ![]()
Page Contents
‾‾‾‾‾‾‾‾‾‾‾‾‾‾‾‾‾‾‾‾‾‾‾‾‾‾‾‾‾
Fight Overview
Mission Requirements:
Score: 850k | Clear without any KOs | Clear within 80 turns | Take 10000 or less HP damage
Featured Characters: Y’shtola, Kuja, Serah, Balthier, Fujin, Lilisette, Sabin
Many team ideas with and without boosted characters are available in this event’s Call to Arms!
To choose the best Call Assists for your team, use the Tonberry Troupe’s Call Hub!
Move List
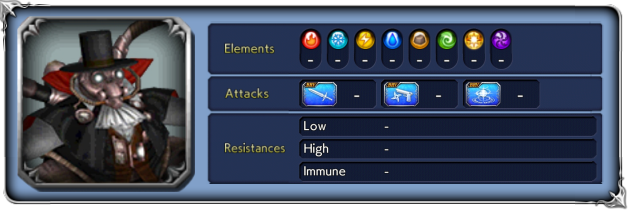
Wave 1: Heretic Count Steam x2

Base stats (courtesy of DissidiaDB):
Max HP: 9,000,000 | INT BRV: 4500 | MAX BRV: 50000 | ATK: 14000 | DEF: 30000 | SPD: 35 | Chase value: 40
| Right Steam/Left Steam | |
| Leg | |
| Group Firaga | |
| Multislash | Recovers from Break; |
| Flame Ball | |
| Steam Burst used 2 turns after “Steam is building!” | Increases BRV if below INT BRV; ignores effects that reduce/nullify HP damage; increases BRV (50% of MAX BRV) “+” version: the initial BRV gain is equal to 30% of your team’s MAX HP, and after the attack will gain 100% MAX BRV. |
| Readying a powerful attack! at 79% and 49% HP | Self-delays; cleanses own debuffs (frames included); becomes immune to all debuffs, and actions cannot be delayed (even by Break) for 1 turn; uses 💀 Multislash+ next |
| 💀 Multislash+ low turn rate; used at 79% and 49% HP | Recovers from Break; increases BRV by 80% of your characters’ MAX HP; Ignores effects that reduce/nullify HP damage |
BRV Gain Reduction: All BRV gains on your team (green BRV numbers from buffs/skills) are reduced by 10%
BRV Damage reduction: All BRV damage caused on the bosses (white BRV numbers from direct attacks) is reduced by 50% (further reduced when the boss hits 79%/49% HP).
Stats increases: Like all Chaos/Lufenia bosses, at 79% and 49% HP their base stats will get invisible increases.
Enrage: Yes. The remaining Count Steam will cleanse all debuffs and increase SPD/ATK/DEF when the first one dies.
Each 1% HP: 90,000 (the final 1% health can be twice that value, because it includes the 0.01% to 0.99% portion)
 Boss Strategy
Even with a very simple moveset, these bosses are brutal. They have an enormous amount of HP (18 million total), so you need to bring heavy hitters and/or a lot of off-turn damage (counter-attacks, traps or launches) to meet the tight turn count. Despite being boosted, Kuja is actually not a top damage dealer by today’s standards! As usual, check the C2A video list if you want to find tried and true team comps.
The crux of this fight is surviving 💀 Multislash+. This attack cannot be prevented. When the first boss reaches 79% HP, both will self-delay and frame their own turns, cleanse all debuffs and become immune to debuffs/delays until their next action. And that next action will always be Multislash+. Keep in mind that it always targets the character who has the highest HP at the moment of the attack; you can manipulate your team’s HP by removing passive abilities from certain characters if you want to choose who will get hit by Multislash+.
Tools to deal with it:
- Let them die and revive after. Aerith and Y’shtola are perfect for this, since both have Last Stand and can tank a Multislash+ themselves, then revive the victim of the other one. Each revive still gives a heavy 20% penalty to the final score, but you can get away with it because score is based on enemy HP (which they have a ton of). If you have any trouble, bring launchers as your Call Assists and use them during summon to further inflate the score.
- If you bring multiple characters with Last Stand, each one will tank a Multislash and end up with 1 HP after (as long as they have the highest current HP at the time). Make sure to heal them right after.
- Evasion works perfectly, since the attack is not a guaranteed hit. Eight, Jack, Edward or Galuf in the main team can completely nullify these attacks as long as they are the target and have their Evasion abilities active when Multislash+ happens (Jack will need to be healed . You can also bring Edge or Cater as Call Assists on your highest HP characters to deal with one of the Multislash+ phases (Theologica has more details here for the CA strategy).
Outside of Multislash+, the bosses are also very fast and hit hard with lots of BRV gains. Steam Burst is a big group HP attack that hurts a lot, but it does have a warning with “Steam is building” two turns before; pay attention to it and time your heals accordingly. While debuffs won’t help with the Multislash+, they are extremely good for all the rest of the fight. It will be much easier to deal with the Count Steams if you lower their stats through debuffs and reapply them after the 79%/49% debuff immunity phases.
Fight timeline cheatsheet:
- 79% HP: 🔮 Lufenia orb appears (25 count), both cleanse all debuffs and become immune to debuffs and delays, use 💀 Multislash+ next turn
- 49% HP: both cleanse all debuffs and become immune to debuffs and delays, use 💀 Multislash+ next turn
 Orb details
Lufenia Orb (if it reaches 0 = game over)
1st: Orb count: 25, appears after at 79% HP, never disappears
Countdown: -1 when player acts, -2 when that boss acts.
Increase: by 5 for each character who receives healing of at least 50% their MAX HP, even if their current HP is already full (max: 25).
This orb is very straightforward, but not that many characters can fulfill its condition. While it is easy to increase their orb counts by 15 at a time
Names in italics can do it frequently, while the others can do it less often (usually only with the LD attack):
- Y’shtola
- Aerith
- Garnet
- Porom
- Rem
- Firion (only with the help of self-healing passives from summon boards)
- Paladin Cecil
- Ceodore
- Rude
- Kimahri
- Ignis
 The Cheese Corner
The usual definition of Cheese is tackling a fight in a manner that ignores or circumvents its main mechanics. Therefore, this is one of the few fights that absolutely can’t be cheesed, since nothing can prevent Multislash+ from happening. Evasion-based teams are the closest thing we could call “cheesing” this fight, since they allow you to play the fight as if that attack did not even exist… so feel free to peruse one of the many Eight or Jack videos from the Call to Arms if you want to have a taste!
💪 Credits
Big thanks to the helpful friends who helped test enemy behavior to speed up the creation of this guide:
from our Dissidia FFOO Telegram Group: @xcaliblur, @dreram, ScottOng11 KN and @mzpro2

