![]()
These guides are only released at least one day after the event has launched, because they are based on first-hand experience from testing and beating the fight with different team comps and strategies. And that takes a good amount of time!
If you would like to help support the effort put into creating this content, please consider becoming a patron. ![]()
Page Contents
‾‾‾‾‾‾‾‾‾‾‾‾‾‾‾‾‾‾‾‾‾‾‾‾‾‾‾‾‾
Fight Overview
Mission Requirements:
Score: 970k | Clear without any KOs | Clear with 3 parties or fewer (for max rewards) | Take 20000 or less HP damage
Featured Characters: Hope, Cloud of Darkness, Shadow, Ultimecia, Krile, Jack
⚠️ Having at least one of Boosted character in the team makes ALL party members have Boosted stats.⚠️
Many team ideas with and without boosted characters are available in this event’s Call to Arms!
To choose the best Call Assists for your team, use the Tonberry Troupe’s Call Hub!
Wave 1 – Move List
Sand Kraken x2
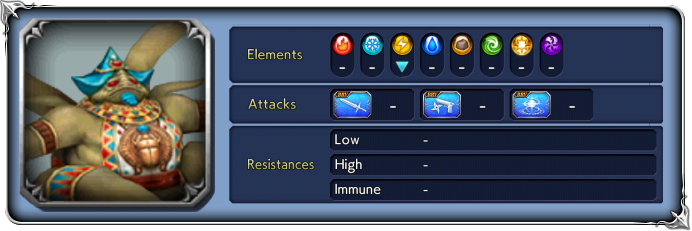
Base stats (courtesy of DissidiaDB):
Max HP: 3,200,000 | INT BRV: 4600 | MAX BRV: 40000 | ATK: 12000 | DEF: 25000 | SPD: 34 | Chase value: 40
| Sandshot | |
| Wallop | |
| Stone | |
| Stonera | |
| Dance of Tentacles | Recovers from Break; |
| Tentacle Explosion | Recovers from Break; |
| Sand Flurry I | Raises INT BRV, MAX BRV, SPD (ends with Harmonic Resolution) |
| Storing Energy free action triggered at 49% HP | Gains a huge amount of BRV (up to 99999) instantly |
| Suffocating Winds | |
| 💀 Suffocating Winds+ used under 49% HP | ignores effects that reduce or nullify BRV damage; delays target 3 turns when inflicting Break; guaranteed hit |
Stat increases: Like most Chaos/Lufenia bosses, at 79% and 49% HP their base stats will get stronger.
Enrage: No.
1% HP: 32,000
 Wave 1 – Strategy
This fight is all about the bosses trying to take revenge for all these months being denied turns by Lightning cheese strats. The Sand Krakens are extremely fast, and love spamming moves that delay your characters multiple turns or inflict ![]() SPD Down. It is very very common that they will act several turns in a row before your team has a chance to react.
SPD Down. It is very very common that they will act several turns in a row before your team has a chance to react.
Make sure you are not caught off-guard when they pass through the 49% HP threshold. The giant BRV gain happens after your turn, and if that Kraken is the next one in line to act, it will unleash that HP attack immediately on whoever it is targeting. If you don’t have a way to survive this (like Evasion or HP damage mitigation), make sure you bring them to 49% HP one at a time, and do it when you have a chance to shave that BRV before their turn.
The best way to counter this wave is by bringing a tank and/or counterattack-based characters. Your first party’s summon or BT phase should probably be used here instead of the second wave, which is easier and has no Lufenia Orbs.
 Orb details
Lufenia Orb (if it reaches 0 = game over)
1st: Orb count: 15, appears at battle start, never disappears
Countdown: -1 when player acts, -2 when that boss acts.
Increase: by 2 when that boss takes ![]() Thunder BRV damage (Orb max: 15)
Thunder BRV damage (Orb max: 15)
Thunder enchanters are a dime a dozen by now, so this is one of the easiest orbs to ignore. Pick your favorite from the list… or, if you have Krile‘s LD, you don’t even have to bring her in your main team. Her Call Assist is a pocket Thunder enchant/imperil for your whole team, and if you bring counterattackers it can be enough to finish the wave without an enchanter in the party… but enchant/imperil does help with the second wave, so one is still recommended for your first party.
Wave 2 – Move List
SAM08G x2
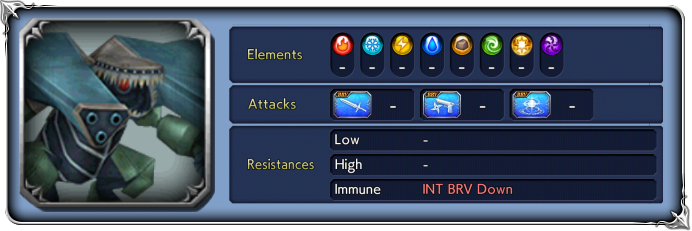
Base stats (courtesy of DissidiaDB):
Max HP: 3,300,000 | INT BRV: 5200 | MAX BRV: 40000 | ATK: 12000 | DEF: 25000 | SPD: 34 | Chase value: 40
| BRV Attack | |
| Rip | |
| Shoulder Charge | |
| Gatling Gun | |
| Cannon Blow | |
| Cannon Blow+/++ | Recovers from Break; |
| Focus | Increases BRV; grants |
| Attacking weakness extra effective! triggers at the start of the wave | Takes extra damage from attacks that hit an elemental weakness |
Stat increases: Like most Chaos/Lufenia bosses, at 79% and 49% HP their base stats will get stronger.
Enrage: Yes. After the first boss is defeated, the second one enrages with Fully Charged (Raises ATK, DEF; restores BRV after each turn)
1% HP: 33,000
 Wave 2 – Strategy
This wave is basically free; your first party should be able to get through most of it (or all) without much trouble, so plan your second party with the 3rd wave in mind.
These bosses have a hidden immunity to launches, and frequently buff themselves (but only one of those buffs is framed). Apart from their constant BRV regen and sapping your team’s BRV, they are extremely simple and don’t require any special measures to fight.
 Orb details
This wave does not have a Lufenia Orb. You can hold off on using your Summon and/or BT phases for the next one.
Wave 3 – Move List
Swarm Fly x1
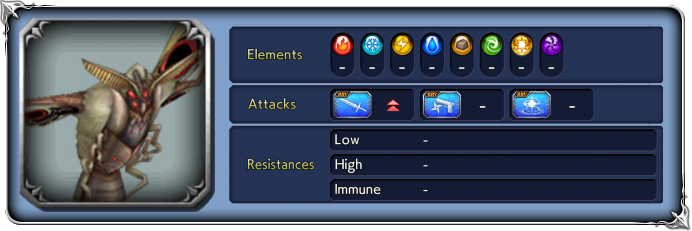
Base stats (courtesy of DissidiaDB):
Max HP: 4,300,000 | INT BRV: 4500 | MAX BRV: 40000 | ATK: 17000 | DEF: 25000 | SPD: 35 | Chase value: 40
| Aero | |
| Aerora | Powerful |
| Aeroga | More powerful |
| Venom Bite | |
| Poison Hit | higher turn rate when inflicting Break or attacking Broken target “+” version: also inflicts |
| Powder Stream | |
| Rallying Cry | Summons small swarm fly; raises ATK, DEF, SPD, INT BRV, MAX BRV of small swarm flies summoned while Angry |
| Mosbite | |
Stat increases: Like most Chaos/Lufenia bosses, at 79% and 49% HP their base stats will get stronger.
Enrage: N/A. The Small Swarm Flies die when the main boss does.
1% HP: 43,000
 Wave 3 – Strategy
The Swarm Fly has a hidden immunity to launches. It is also highly resistant to ![]() Melee attacks, but this can be easily bypassed by elemental enchant/imperil.
Melee attacks, but this can be easily bypassed by elemental enchant/imperil.
It starts out alone, and will summon 2 smaller flies later in the fight. This is a great wave to bring a fast damage dealer with free turns or turn manipulation (like, say, Jack or Ultimecia) and focus damage on the main boss to kill it as quickly as possible. If you go all out on damage and get rid of the smaller flies before they have a chance to act, you don’t have to worry about any fight mechanics. Otherwise, the flies will try to give BRV and ![]() HP Regen to one another. The only danger in this wave is if you allow the flies to stay alive and act freely, in which case they can battery each other for big HP attacks.
HP Regen to one another. The only danger in this wave is if you allow the flies to stay alive and act freely, in which case they can battery each other for big HP attacks.
 Orb details
Lufenia Orb (if it reaches 0 = game over)
1st: Orb count: 15, appears at 59% HP, never disappears
Countdown: -1 when player acts, -2 when that boss acts.
Increase: by 10 when that target takes BRV damage from debuffs (Sap or Poison-like effects) (max: 15)
Bring any character with a Poison/Sap-like debuff or aura, and just be careful that the bosses need to take turns for the orb counter to refresh. If you don’t have any of those characters, anyone with an E slot can equip Faris’ or Thancred’s RF sphere, and its effect does count to refresh the orb.
Some good sources of Poison/Sap damage:
- Ultimecia
- Exdeath
- Shantotto
- Beatrix
- Cecil (Dark Knight) (but he suffers due to the Launch immunity)
- Vivi
- Kimahri
- Kefka
- Sherlotta
- Gabranth
- Alphinaud
Just be careful to not gimp your run by running out of actions and being forced to switch teams when the orb is about to blow up!
Wave 4 – Move List
Heavy Gunner x2
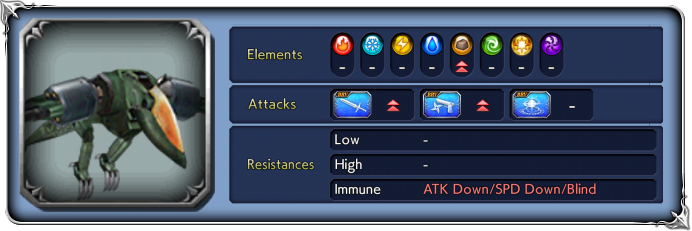
Base stats (courtesy of DissidiaDB):
Max HP: 3,200,000 | INT BRV: 4600 | MAX BRV: 46000 | ATK: 20000 | DEF: 30000 | SPD: 34 | Chase value: 40
| BRV Attack | |
| Glide | |
| Single-Wing Fire | |
| Dual-Wing Fire | |
| Swoop | |
| Lift Flame | Increases BRV; |
| Air Cutter | |
| Aerial Wing | |
| Charged Shot + version if the shield from Repair is not broken | Recovers from Break; “+” version: Dispels target’s buffs (including frames) before the attack |
blue aura, lasts 2 turns; triggers at 79% and 49% HP or after some of their attacks | Increases BRV damage dealt; for the next 2 turns, triggers Lift Flame+ as a follow-up attack if BRV reaches a certain amount (20k-ish?) during its turn. |
| 💀 Lift Flame+ triggered if at high BRV while the blue aura is active | increases BRV; |
| 🛡 Repair green rays of light flying up | Gains a shield that nullifies BRV damage; for 1 turn, becomes immune to debuffs, launches and delays (even delays from Breaks) |
| 💀 Charged Shot+ triggered if the shield from Repair is not broken | recovers from Break; |
Stat increases: Like most Chaos/Lufenia bosses, at 79% and 49% HP their base stats will get stronger.
Enrage: Yes. After the first boss dies, the other one will trigger Limiter Disengaged (raises all stats).
1% HP: 32,000
 Wave 4 – Strategy
The final wave is a bit more challenging than the previous ones. Bringing shields or strong BRV/HP damage mitigation is almost mandatory, not only because of the orb requirements, but also because these bosses love spamming strong group attacks. You also need strong BRV shaving (preferably Magic damage) or heavy INT BRV Down debuffs to deal with their shields.
Their two main mechanics are Release and Repair:
![]() Release happens after a certain number of actions, or automatically at 79% and 49% HP. It is a blue aura that lasts for 2 turns and makes their attacks deal even more BRV damage; if they end the turn with a certain amount of BRV (around 20k) while the blue aura is active, it will trigger the deadly 💀 Lift Flame+ follow-up attack, which does a full dispel before a big BRV+HP attack on your team. To avoid that, make sure you keep them shaved and have ways to mitigate the BRV damage cause by their attacks.
Release happens after a certain number of actions, or automatically at 79% and 49% HP. It is a blue aura that lasts for 2 turns and makes their attacks deal even more BRV damage; if they end the turn with a certain amount of BRV (around 20k) while the blue aura is active, it will trigger the deadly 💀 Lift Flame+ follow-up attack, which does a full dispel before a big BRV+HP attack on your team. To avoid that, make sure you keep them shaved and have ways to mitigate the BRV damage cause by their attacks.
🛡 Repair is triggered as a free action after one of their other attacks, and gives them a big shield (>40k BRV) as well as immunity to debuffs, launches and delays. If the shield is not broken, their next attack will be ![]() Charged Shot+, which dispels all buffs from the target and deals high damage. If the shield is broken, the attack will be the normal BRV+HP version, without dispelling any buffs.
Charged Shot+, which dispels all buffs from the target and deals high damage. If the shield is broken, the attack will be the normal BRV+HP version, without dispelling any buffs.
The bosses have strong resistance to Melee and Ranged attacks, so bring an elemental enchanter (except Earth) if you want to use non-magic attackers. Great characters for this wave are Ultimecia, Hope, Warrior of Light, Rude, Xande, Krile, Rude, Gladio and Desch. In addition to BRV damage mitigators, framed ATK Down debuffs are also effective by making the bosses’ attacks deal less damage and reduce the risk of a Lift Flame+ (examples: Reno or Exdeath). Debuffs in general work very well, since they have no cleanses and the debuff immunity windows are very short.
 Orb details
Lufenia Orb (if it reaches 0 = game over)
1st: Orb count: 10, appears at battle start, never disappears
Countdown: -1 when player acts, -2 when that boss acts.
Increase: by 10 TO BOTH when any boss attacks and has the BRV damage of that attack reduced by a buff or a shield (Orb max: 15)
This orb demands that you bring a character with shields or BRV damage mitigation and let the enemy hit you. Be very careful about delaying or deleting enemy turns too much, because if the orb count is low and a boss is paralyzed or misses its attack, it’s a game over. And if you have to switch teams mid wave, make sure the orb counts are high enough to last until the bosses have a chance to act again.

