![]()
These guides are only released at least one day after the event has launched, because they are based on first-hand experience from testing and beating the fight with different team comps and strategies. And that takes a good amount of time!
If you would like to help support the effort put into creating this content, please consider becoming a patron. ![]()
Page Contents
‾‾‾‾‾‾‾‾‾‾‾‾‾‾‾‾‾‾‾‾‾‾‾‾‾‾‾‾‾
Fight Overview
Mission Requirements:
Score: 780k | Bring 1 FF VII character | Bring 2 White Crystal characters | Bring 1 Red Crystal character
Featured Characters: Vincent
Many team ideas with and without boosted characters are available in this event’s Call to Arms!
To choose the best Call Assists for your team, use the Tonberry Troupe’s Call Hub!
Move List
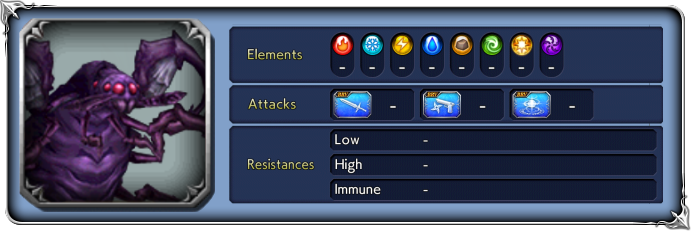
Wave 1: Heretic Crust Beetle x2

| BRV Attack | |
| Giant Pincers | |
| Sandstorm | Reduces all targets’ BRV to 0; |
| Crust Disaster | Recovers from Break; increases BRV; ignores shields and other effects that reduce or nullify BRV damage |
| Blaze | “+” version: more powerful hit; “++” version: even more powerful; high turn rate; inflicts |
| Firm Horn | |
red aura; low turn rate | Increases BRV; raises ATK, SPD, INT BRV; enters Enraged state (red aura); don’t get broken while they are enraged! Lasts for 3-4 actions, ending after they use Triggered for both Beetles as soon as one hits 49%HP |
| 💀 Hard Cut instant follow-up if they break or hit a broken target with single-target attack in red aura | Cleanses own non-framed debuffs; Deadly |
| Ferocity increases/increases further triggers at 79% and 49%HP | In addition to the usual stats increases, also: inflicts This can be prevented by Blind, Pyramid, etc |
Stat increases: All Lufenia bosses increase their base stats , at 79% and 49% HP, and their BRV reductions will move one step further:
BRV Damage Reduction: All direct BRV damage from your attacks is reduced by 70/75/80%.
BRV Gain Reduction: All BRV gains on your team (green BRV numbers from buffs/skills) are reduced by 10/20/30%.
Enrage: Yes. When the first Crust Beetle dies, the other one will trigger Hatred Power+, becoming enraged and gaining 50k+ BRV.
 Boss Strategy
These bosses are a variant of the good old Crust Beetles we already know and definitely don’t love. They are tamer than usual, though; unlike previous versions, in this fight they do not cleanse debuffs automatically when they enrage. They only cleanse generic debuffs when using Hard Cut, which is not very frequent.
Their main mechanic is ![]() Hatred Power, a self-buff that applies a big BRV gain and enrage (red aura – kinda hard to see). In the following turns, the Crust Beetle will do 2-3 single target attacks and culminate on a
Hatred Power, a self-buff that applies a big BRV gain and enrage (red aura – kinda hard to see). In the following turns, the Crust Beetle will do 2-3 single target attacks and culminate on a ![]() Crust Disaster that hits very hard and ignores shields or buffs that reduce/nullitfy BRV damage. After Crust Disaster, the Beetle will calm down until one of them uses Hatred Power again. It is imperative that you avoid being broken while the effect is active, because any single target attack that hits a Broken character while the red aura is active will result in a very strong follow-up attack, very likely to kill the target.
Crust Disaster that hits very hard and ignores shields or buffs that reduce/nullitfy BRV damage. After Crust Disaster, the Beetle will calm down until one of them uses Hatred Power again. It is imperative that you avoid being broken while the effect is active, because any single target attack that hits a Broken character while the red aura is active will result in a very strong follow-up attack, very likely to kill the target.
When the first Beetle hits 49% HP, both will trigger Hatred Power together. Make sure to have a way to avoid Breaks and to have a way to survive the damage from the oncoming Crust Disasters, especially if both queue ![]() attacks together. Setzer’s Call Assist can be a lifesaver, just like Warrior of Light’s LD, Reno’s LD, Nine’s LD, Beatrix’s EX buff, etc. Buffs that prevent BRV damage will not work, but anything that prevents HP damage does. Warrior of Light can make this fight extremely easy to survive, so he is highly recommended, but Nine and Guy are also good options to tank these attacks.
attacks together. Setzer’s Call Assist can be a lifesaver, just like Warrior of Light’s LD, Reno’s LD, Nine’s LD, Beatrix’s EX buff, etc. Buffs that prevent BRV damage will not work, but anything that prevents HP damage does. Warrior of Light can make this fight extremely easy to survive, so he is highly recommended, but Nine and Guy are also good options to tank these attacks.
When each Beetle hits 79% and 49% HP, they will try to inflict ![]() 5T ATK Down,
5T ATK Down, ![]() 5T MAX BRV Down and
5T MAX BRV Down and ![]() 5T Poison on all of your characters. This can be prevented by a well-timed Pyramid if you have Reno in your team.
5T Poison on all of your characters. This can be prevented by a well-timed Pyramid if you have Reno in your team.
This fight is easier if you bring Vincent, but he is not required, unlike the Abyss that was released with Balthier’s LD. It’s all a matter of bringing Red and White characters who can fulfill the Code requirements while also countering the Orbs and surviving the Beetles. This might be harder or easier depending on how many built FFVII characters you have. As usual, you can find tried and true ideas for team comps in the Call to Arms for this event.
 Orb details
Lufenia Orb (if it reaches 0 = game over)
1st: Orb count: 20, appears at battle start, never disappears
Countdown: -1 when player acts, -2 when that boss acts.
Increase: whenever that boss takes BRV damage from a debuff (Poison/Sap and similar effects), orb increases by +10 (max: 25).
This orb is laughably easy to deal with as long as you bring any character who inflicts a debuff with some kind of Poison or Sap-like effect, or anyone who has an E slot with Faris or Thancred spheres (reminder: Thancred’s RF sphere is currently available in the Refine shop). As long as you don’t delay or delete their turns too much, the spheres will be constantly refreshing to near max count.
💪 Credits
Big thanks to the helpful friends who helped test enemy behavior to speed up the creation of this guide:
from our Dissidia FFOO Telegram Group: @xcaliblur, @dreram and ScottOng11 KN
from discord: vribas79#2227

