![]()
These guides are only released at least one day after the event has launched, because they are based on first-hand experience from testing and beating the fight with different team comps and strategies. And that takes a good amount of time!
If you would like to help support the effort put into creating this content, please consider becoming a patron. ![]()
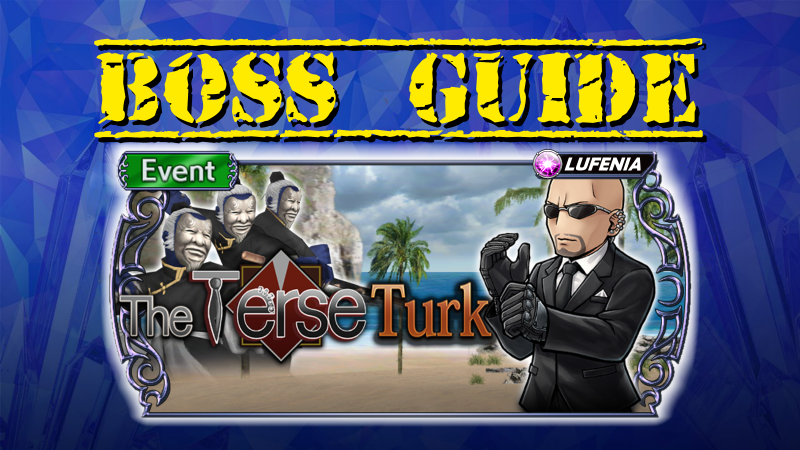
Fight Overview
Mission Requirements:
Score 960k | Clear without any KOs | Clear within 75 turns | Take 15000 or less HP damage
Featured Characters: Sephiroth, Ciaran, Rude, Yuffie, Lann & Reynn
Many team ideas with and without boosted characters are available in this event’s Call to Arms!
Important reminder: this event is time-limited, but the rewards are NOT vital! If the fight is giving you too much trouble, don’t feel bad about skipping it. Missing a few HG tokens here and there will not cripple your roster.
Wave 1: Masked Monk x3
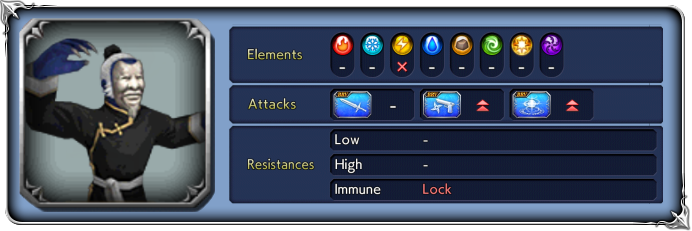
Base stats (courtesy of DissidiaDB):
Max HP: 4,500,000 | INT BRV: 4500 | MAX BRV: 40000 | ATK: 17000 | DEF: 16000 | SPD: 30 | Chase value: 40
| BRV Attack | |
| Spirit Pulse | |
| Spirit Blast | if White Mask: increases BRV if Red Mask: inflicts |
| Vital Feed | Recovers from Break; restores own HP based on HP damage dealt; if White Mask: increases BRV if Red Mask: inflicts |
| Vital Feed+ | Increases BRV; restores own HP based on HP damage dealt; grants party BRV |
| Triple Combo | if White Mask: increases BRV if Red Mask: inflicts |
| Vital Thrust | higher turn rate when Breaking or attacking a Broken target; if White Mask: increases BRV if Red Mask: inflicts |
| Vein Split | Recovers from Break; if White Mask: increases BRV if Red Mask: inflicts |
| Vein Split+ | Increases BRV; grants party BRV |
| Limber Wall | Nullifies a certain amount of BRV damage |
| Vital Feed++ (Used when the shield from Limber Wall is not broken) | Increases BRV; removes target’s buffs (including frames); restores own HP based on HP damage dealt |
Stat increases: Like all Chaos/Lufenia bosses, at 80% and 50% HP their base stats will get stronger.
Enrage: Yes. When one dies, the other two will trigger “First Kata” (raises ALL STATS). When the second one dies, the remaining Monk will trigger “Second Kata” (raises ALL STATS again). Try to finish them off close together.
1% HP: 45,000
 Boss Strategy
The main mechanic here is related to the color of the mask on each monk. They all start white, and will change color one step further (from white to yellow, from yellow to red, and then stay red) after every action they take:
![]()
![]()
![]()
![]()
![]()
They will move one step back (red to yellow, yellow to white) after receiving a Break (except from some counterattacks, like Gladio or Gau, unless it’s a different monk causing the counterattack).
![]() White mask only gives them BRV regen (>20k per turn). You want to keep them in White as much as possible.
White mask only gives them BRV regen (>20k per turn). You want to keep them in White as much as possible.
![]() Yellow mask gives them HP regen (90k per turn) instead. Do your best to break them back into White.
Yellow mask gives them HP regen (90k per turn) instead. Do your best to break them back into White.
![]() Red mask is horrible. It gives them BRV and HP regen, cleanses all debuffs (including framed), and gives them debuff immunity for as long as the mask stays red. It also adds
Red mask is horrible. It gives them BRV and HP regen, cleanses all debuffs (including framed), and gives them debuff immunity for as long as the mask stays red. It also adds ![]() 3T Diminishing Spirit to most of their attacks.
3T Diminishing Spirit to most of their attacks.
The crux of the fight is that you need strong BRV shaving (or rebreaks, like Ardyn and Strago) to keep breaking them in order to avoid the Red mask. They frequently end their turn with 20~40k BRV, so we are talking STRONG group damage to keep things under control. If they reach the red state, it is very hard to bring them back to white on a team without rebreaks or turn manipulation/deletion. They resist ![]() Magic and
Magic and ![]() Ranged damage, so either bring a capable
Ranged damage, so either bring a capable ![]() Melee attacker or an enchanter/imperil unit to enable the others. But
Melee attacker or an enchanter/imperil unit to enable the others. But ![]() Thunder damage is nullified, locking out some of our best enchanters, which leaves Kuja (and surprisingly, Rydia [1] [2] ) as great options to enchant your team.
Thunder damage is nullified, locking out some of our best enchanters, which leaves Kuja (and surprisingly, Rydia [1] [2] ) as great options to enchant your team.
In addition to the Mask gimmick, at two points in the fight they will gain a >30k BRV shield that needs to be removed before their next action. If that does not happen, their next attack will be a BRV+HP hit that dispels all buffs from the target. This is very lethal for characters who need buffs to avoid damage, like Gladio.
Fight phases
![]() From 100% to 79% HP:
From 100% to 79% HP: ![]() Orb [15]
Orb [15]
The orbs will only tick down if the enemies have >10000 BRV. It doesn’t require a lot of extra attention, since you want to keep breaking them anyway to maintain the masks at White or Yellow. If you brought units that require enchant/imperil to deal damage, do that ASAP, because the Monks will get out of hand quickly if you don’t start breaking them right after their first turn.
Be VERY careful if you see multiple monks queue up an ![]() attack at the same time. Try to break their turns apart to have a chance to react (and possibly heal) between their strong BRV+HP attacks. Play carefully and avoid being broken; they can KO your team.
attack at the same time. Try to break their turns apart to have a chance to react (and possibly heal) between their strong BRV+HP attacks. Play carefully and avoid being broken; they can KO your team.
Each Monk will lose his orb separately when at 79% HP.
![]() From 79% (on any of them) to 70% HP:
From 79% (on any of them) to 70% HP: ![]()
![]()
![]() Mask Change (all yellow)
Mask Change (all yellow)
When the first Monk hits 79%HP, all of them will immediately change their masks to Yellow regardless of what color they were before. This can be disastrous if they change to Yellow at a point where you won’t have enough turns to break them before they act (the mask change delay themselves 3 turns, but depending on their turn order the net result may still leave you with only one or two characters able to act before them). But if you screwed up during the first phase and any of them is currently Red, it will actually be helpful – a chance to move them back to White if you did not bring any rebreaks.
![]() From 69% (on any of them) to 50% HP:
From 69% (on any of them) to 50% HP: ![]() Orb [12] and
Orb [12] and ![]() Light Blue Aura (shields)
Light Blue Aura (shields)
This is the first appearance of the shields from Limber Wall. Prepare for it, and only drop them to 79% when you know you will have turns to shave their shields down before their next action.
![]() From 49% (on any of them) to 30% HP:
From 49% (on any of them) to 30% HP: ![]()
![]()
![]() Mask Change (all red)
Mask Change (all red)
This is the trickiest point of the fight. All of them will change masks to Red, regardless of the current color. If your team has no rebreaks or turn manipulation (like, say, an Amidatelion friend), you have to plan some other way to bring them back to White, otherwise they will keep switching between Red and Yellow and recovering HP/dispelling all debuffs. A few suggestions:
- Break them all to Yellow and immediately use as many AAs/free turn skills as you can before their next turn, until they recover INT BRV and unbreak naturally on their 5th turn – and you can break them again to become White;
- Make them yellow and use your Summon to have enough turns for them to unbreak naturally, like above;
- Use a friend unit that will allow you to break them twice between their turns, like Sephiroth (with BT) or Amidatelion. For Seph BT, the optimal method is calling him earlier, above 55% HP, and using his skills in this order: EX>LD>BT>LD>LD (or BT as the second skill if they are too close to 49%).
![]() From 29% to 0% HP:
From 29% to 0% HP: ![]() Light Blue Aura (shields) and
Light Blue Aura (shields) and ![]() Orb [10]
Orb [10]
This is just a repeat of what happened at 69%, and if you took care of the Red Masks situation earlier, should not give you much trouble. The major difference is that at this point their stats are higher, especially SPD; so be extra careful to not let them have two turns in a row. If you still have your Summon or Call Assist, use them as a panic button when needed.
 Orb details
Lufenia Orb (if it reaches 0 = game over)
Special: While the orb is in play,
1st: Orb count: 15, appears at wave start, disappears when HP is 79%
2nd: Orb count: 12, appears at 69% HP, disappears at 49%
3rd: Orb count: 10, appears at 29% HP, never disappears
Countdown: -1 when player acts, -2 when that boss acts.
Pause: when that enemy’s BRV is below 10k
Luckily, these orbs are not as bad as the last ones. Since you will be constantly trying to break these enemies anyway, you will be keeping the counter paused most of the time.
🧀 The Cheese Corner
- “Amidatelion is overrated”, chapter XIV: Silly monks, you can’t change masks if you get no turns at all! By abusing Amidatelion + Ami friend, you can deny them any chance to act. The only time you will need to deal with red masks is at 49%. Xcaliblur discusses options to deal with that while showing off the strategy here.
DISCLAIMER:
Challenge quests are just a small bonus if you have already geared up the characters it asks for. If you haven’t, it is NOT worth pulling for a new character or spending ingots if you only intend to use them here. You can easily clear it with any team to get 400 gems and 3 tickets. The extra rewards for a Perfect complete with boosted characters are a measly 100 gems and 2% of a BT weapon. Not worth the hassle!
For a good idea of what team comps are able to complete this, and which characters can help without having all their gear, check the Challenge Quest tab in the Call to Arms.