Mission Requirements:
Score 730k | Clear without any KOs | Clear within 100 turns | Take 20000 or less HP damage
Featured Characters: Kefka, Emperor, Strago, Relm, Ashe
Many team ideas with and without boosted characters are available in this event’s Call to Arms!
![]()
These guides are only released at least one day after the event has launched, because they are based on first-hand experience from testing and beating the fight with different team comps and strategies. And that takes a good amount of time!
If you would like to help support the effort put into creating this content, please consider becoming a patron. ![]()
Fight Overview & Team building
Recommended:
- Characters with Instant Break or percentage-based BRV shaving
- A Tank or HP Damage Mitigator
- Heavy Magic damage dealers
- A Healer
- A Debuffer (especially with MAX BRV Down, Sap/Poison effects or SPD Down)
Avoid:
- Ranged attackers if you don’t bring enchant/imperil
- Elemental attackers that use


Summon tips:
- Leviathan helps slowing down their attack cycles to give you more time to respond (but don’t summon if both bosses are under blue aura). Odin has a chance to instantly break them and save a run. Alexander is a great source of healing for the Challenge Quest.
Wave 1: Fierce x1

Base stats (courtesy of DissidiaDB):
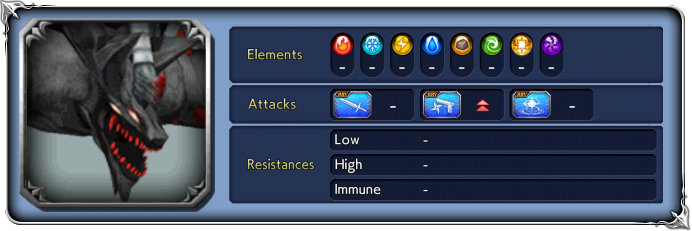
Max HP: 4,600,000 | INT BRV: 4400 | MAX BRV: 40000 | ATK: 11000 | DEF: 14500 | SPD: 34 | Chase value: 40
| Rake (while quadrupedal) | |
| Hurl (while quadrupedal) | |
| Flare (while quadrupedal) | |
| Beatdown (while quadrupedal) | |
| Blaze Wave (while quadrupedal) (gains blue aura) | starts RESISTING starts ABSORBING canceled when inflicted with Break or after taking one action; low turn rate |
| BRV Attack (while bipedal) | |
| Slice (while bipedal) | |
| Reaper (while bipedal) | |
| Earth Rush (while bipedal) | Recovers from Break; |
| Wrath Cut (while bipedal) | |
| Flame Vortex (while bipedal) | |
| Seraphorce (while bipedal) (gains white aura) | reduces BRV damage taken by 75%; absorbs BRV on character’s turn; canceled when inflicted with Break or after taking one action; low turn rate |
At wave start: Chaos aura grants 50% increase to SPD and lowers BRV damage taken by 30%
“Power increased…!”:(activates at 80% HP):
Aura changes to 30% increase to ATK, INT BRV, MAX BRV and 60% to SPD, lowers BRV damage taken by 40%
“Power further increased…!“: (activates at 50% HP):
Aura changes to 50% increase to ATK, INT BRV, MAX BRV and 70% to SPD, lowers BRV damage taken by 60%
Enrage: No. You can kill them separately without extra danger.
What an interesting fight! While it is only one wave, both bosses combined have almost 10 million HP – bring your best magic damage dealers to make sure you don’t run out of gas when they reach red health.
The bosses switch frequently between two positions: quadrupedal (regular stats) and bipedal (higher ATK, lower DEF). They also follow a very clear pattern of attacks. At the beginning of the fight, it is:
(quadrupedal) -> regular attack -> Blaze Wave (gains blue aura) -> regular attack -> stands up
(bipedal) -> three regular attacks -> crouches down -> repeat
After hitting 80% HP (“Power increased…!“), their pattern changes:
(quadrupedal) -> regular attack -> Blaze Wave (gains blue aura) -> regular attack -> stands up
(bipedal) -> Seraphorce (gains white aura) -> two regular attacks -> crouches down -> repeat
You need to have a good plan to deal with both of their auras, so knowing exactly when they will happen is very helpful! Both auras can be removed by inflicting a Break, or by allowing the boss to take an action (so keeping them paralyzed/disabled/sleeping does not count, but it does buy you more time to react). The auras make it very hard (but not impossible; see below) to deal direct BRV damage to the bosses, and put you at a high risk of being killed by their next attack. Luckily, both auras come from moves with low turn rate, so you have some breathing room to respond.

Blue Aura: The boss will gain a good amount of BRV from hitting your team, and become extremely difficult to damage. It will outright absorb any Physical attacks, and Magic attacks of the wrong element ( ![]()
![]()
![]()
![]() ). Your only way to deal direct BRV damage will be Magic attacks without any of those elements, and even then, the damage will be reduced by 90%. As long as you avoid feeding them BRV through your attacks, it is quite possible to survive the follow-up attack and heal back up, as long as you bring some way to reduce its BRV without direct damage (like Sap/Poison or Gravity attacks) or use HP damage mitigators.
). Your only way to deal direct BRV damage will be Magic attacks without any of those elements, and even then, the damage will be reduced by 90%. As long as you avoid feeding them BRV through your attacks, it is quite possible to survive the follow-up attack and heal back up, as long as you bring some way to reduce its BRV without direct damage (like Sap/Poison or Gravity attacks) or use HP damage mitigators.

White Aura: The boss will deal a strong single target attack and gain a HUGE amount of BRV, also draining a lot of BRV from each of your characters before they act. They will easily reach up to 60000 BRV in the later parts of the fight, and the aura reduces all direct damage by 75%, on top of their already existing BRV damage reduction. This aura does not have any pesky physical/elemental absorption, so it is possible to overpower it through brute force – but you need to deal way over 16k damage per turn just to offset the BRV the boss will drain from each of your characters. Effects that stop BRV gain – like Edward’s EX debuff – or gravity attacks are possible counters as well.
The catch-all solution to both auras is bringing abilities that cause guaranteed breaks to remove them, but, given their special defenses, not all of characters with such abilities will be easy to use. For some examples:
- Strago: being the featured character for this event, he is obviously the perfect solution. Both his LD and BRV 2 Death are non-elemental magic attacks and deal guaranteed breaks.
- Kefka: His EX is a non-elemental magic guaranteed break, but only against one target. It works well, but (by itself) will not be enough to remove their auras every time.
- Relm: If you equip Odin summon, her Sketch Summon has a chance to instantly break both enemies. Not a guaranteed solution, but when it works, it is great.
- Trey: His EX debuff guarantees any BRV damage that is not nullified or absorbed will instantly break them. It’s a great solution, as long as you have someone else in the team to deal the appropriate Magic damage to inflict the break on the blue aura. But do note that these bosses have permanent 90% resistance to Ranged attacks, so if you don’t bring an enchanter/imperiler as well, Trey will have low damage output through the fight.
- Ardyn: His EX charges relatively fast and can instantly break both enemies if you keep their rotations in sync, but his melee damage will be absorbed before the blue aura dissipates, so it only works if you have another BRV shaver ready to remove all of that BRV again before the bosses can act. Far from an ideal solution there, but it works perfectly on the white aura.
- Gabranth: He suffers from the same Melee problem as Ardyn against the blue aura, and likewise, is great against the white aura – except his guaranteed break is single target only, but more on demand. Gabranth has the additional benefit of bringing good BRV and HP damage mitigation.
- Lann & Reynn: Sadly, they are a no go. In addition to the heavily outdated damage output, their elemental magic will be merrily absorbed by the blue auras.
Instant breaks are not the only solution to remove their auras. The alternative is simple: you let them attack, and just survive. As soon as they take an action, the aura will be gone. Some examples:
- Basch: If you have his LD, there is absolutely no danger to this fight. He will eat all damage and smile triumphantly; you don’t even need a healer. Just bring companions with enough damage to complete the score and turn objectives, and have fun.
- Galuf: The budget immortality option, Best Grandpa continues to destroy any fight where the enemies can only deal HP damage through Physical attacks. And he doesn’t even have an LD! Just make sure you bring some way to deal with ALL attacks while they have the white aura.
- Edward: you can Hide to completely nullify an attack if he is targeted while an aura is up, and his EX debuff will drastically reduce threat by not allowing the bosses to gain BRV for the white aura. If all else fails, use Sleep as a panic button to remove all their BRV and let another party member break them. Yet another easy way to completion without boosted characters.
- Kimahri: His 100% Blind can guarantee the bosses will whiff their attacks. Since their auras are very predictable, it’s easy to know when to use it, but his EX will not charge fast enough to deal with all auras by itself. (Ranged attacker – requires and enchant/imperil party member)
- Nine: His LD buff will completely deny 1 hit of HP damage, good for emergencies, but with limited uses. If you are lucky, the enemies will target different party members and one LD use will be good against multiple auras. (Ranged attacker – requires and enchant/imperil party member)
- Relm: While just a 50% chance, her blindness can be a desperate way to turn a killing blow into a whiff!
- Ultimecia: If you lack any of the strong Magic damage dealers from the current banner, the Time Sorceress is very capable of filling that slot AND bringing a lot of percentage-based BRV damage to help you break the bosses.
- Characters with Evasion or Last Stand: Make a team with them and you can always ignore and/ or tank the aura-buffed attacks with your face, then heal right back up!
- Characters with HP Damage Mitigation: As long as you don’t have your attacks absorbed by the blue aura, and shave down at least some of their BRV in white aura, it is quite possible to survive those lethal hits if you bring some of these characters.
- Debuffers with MAX BRV Down, Sap/Poison and similar effects: if the bosses can’t gather enough BRV to kill your team, or lose a big part of that BRV as soon as their turn comes, it becomes possible to just face-tank the hits and ignore their auras.
Since the bosses will not use Seraphorce while their HP is above 80%, for some teams it is a very good plan to focus all attacks on one of them at first, giving you more time without having to worry about the white aura. For other teams, it might be best to try and keep their cycles completely in sync, so you can deal guaranteed breaks to both at once. Choose what is beast for your party composition.
Beware that, as the fight goes on, their stats will increase as usual, especially their SPD. This means the cycles will go faster from one aura to another, and you might have trouble keeping up. At low health, they become so fast you might not have a chance for a vital character to act and defuse their auras when needed. Save your summon and/or friend unit as a panic button if you get to a point where you will not have a chance to stop an aura from becoming a lethal attack.

DISCLAIMER:
Challenge quests are just a small bonus if you have already geared up the characters it asks for. If you haven’t, it is NOT worth pulling for a new character or spending ingots if you only intend to use them here. You can easily clear it with any team to get 400 gems and 3 tickets. The extra rewards for a Perfect complete with boosted characters are a measly 100 gems and 2% of a BT weapon. Not worth the hassle!
All of the boosted characters for this CQ (except Ashe…) are great magic damage dealers, so you can rest easy that the damage part of your team is covered. But they do lack adequate sources of healing, and the HP damage limit to perfect the mission is 20000. So you should either make good use of Kefka’s debuffs and HP Attack Disable (especially when they target ALL while standing up) to minimize damage taken, or bring Alexander as your summon to heal up after Earth Rush.
To deal with their blue or white auras, Strago is your best tool; his LD is a guaranteed Break, and so is BRV 2 Death when their BRV is an even number (which is often the case when the white aura is active). Kefka’s EX is also a guaranteed break when his weapon is fully upgraded. If you lack either option, Relm equipped with the Odin summon has a random chance of instant break, and failing that, the Blind applied by her Sketch is one relatively safe way of allowing the Fierce to take an action and dispel the aura. Sadly, negating their actions through HP Attack Disable or Ashe’s Paralysis will not count as a turn to make their aura disappear; but they can buy you time to shave their BRV down with brute force if needed, or to charge Kefka’s EX.
Gear Check: Kefka, Emperor and Relm work much better at EX+3LB and having their LDs, but you can work with less than perfect gear if your other team members make up for it. Strago can still be useful with as little as just his 35CP weapon if all you want from him is the insta-break from BRV 2 Death, and post-rework Relm can still contribute to the fight with just her 35CP.
For a better idea of what team comps are able to complete this, check the Challenge Quest tab in the Call to Arms.

