Mission Requirements:
Score 750k | Clear without any KOs | Clear within 110 turns | Take 20000 or less HP damage
Featured Characters: Noctis, Basch, Vaan, Serah
Many team ideas with and without boosted characters are available in this event’s Call to Arms!
![]()
These guides are only released at least one day after the event has launched, because they are based on first-hand experience from testing and beating the fight with different team comps and strategies. And that takes a good amount of time!
If you would like to help support the effort put into creating this content, please consider becoming a patron. ![]()
Fight Overview & Team building
This fight is incredibly easy with the boosted characters, or any team bringing good damage and HP damage mitigation.
Recommended:
- Strong damage dealers with good longevity
- Party BRV Shields (like Nine or Warrior of Light)
- HP Damage Mitigators
- Healers
- Debuffers, especially MAX BRV Down and SPD Down
- Turn Delayers
Avoid:
-
 Thunder and
  Earth attackers
Summon tips:
- Leviathan fills up the only free buff slot Basch has, preventing him from receiving important buffs like the one from Noctis’ LD. Ramuh and Brothers are not recommended, because the last boss absorbs them. Summon on wave 2, or before the end of wave 1 if you want to use the delay strategy.
Wave 1: Iron Worm x2
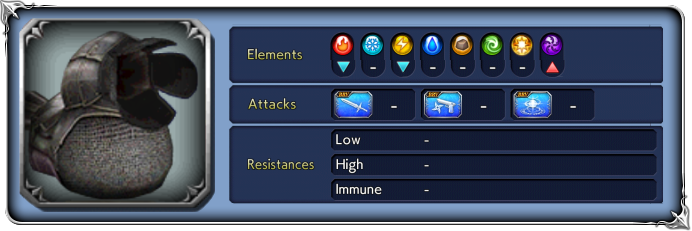
| Blastbomb | |
| Iron Head | |
| Bullet Tornado | |
| Shake Off | |
| Reaper | |
| Saliva | inflicts |
| Group Gravity Spin (used at wave start, 80% and 50%HP) | Changes own BRV based on total of enemies’ current HP; |
| Iron Defense (free action after Group Gravity Spin) | Increases BRV when less than INT BRV; grants raises DEF |
“Gathering strength…!”:(activates at 80% HP):
Chaos Aura gives 30% increase to ATK, INT BRV, MAX BRV and 10% to SPD
“Further gathering strength…!“: (activates at 50% HP):
Aura changes to 50% increase to ATK, INT BRV, MAX BRV and 20% to SPD
Enrage: No. They can be killed one at a time without consequence.
These are very simple enemies. Both of them always start with Group Gravity Spin, causing almost guaranteed HP damage – which can be useful if you want to trigger Leviathan’s blessing, but not that good if you’re bringing Alexander. After that, they will cycle through single target attacks and ![]() Shake Off for a while.
Shake Off for a while.
After their HP drops below 80%, their next ![]() attack will be Group Gravity Spin again, followed by Iron Defense. From that point on, their attacks will be upgraded to Saliva and
attack will be Group Gravity Spin again, followed by Iron Defense. From that point on, their attacks will be upgraded to Saliva and ![]() Reaper, until they hit 50% HP, which will trigger the final Group Gravity Spin + Iron Defense. Their attack pattern does not change.
Reaper, until they hit 50% HP, which will trigger the final Group Gravity Spin + Iron Defense. Their attack pattern does not change.
If you have a team focused on delaying/deleting turns, you may want to summon before dealing the killing blow to the last Iron Worm. More information below.
Wave 2: Might Eater x1, Mite Eater x2
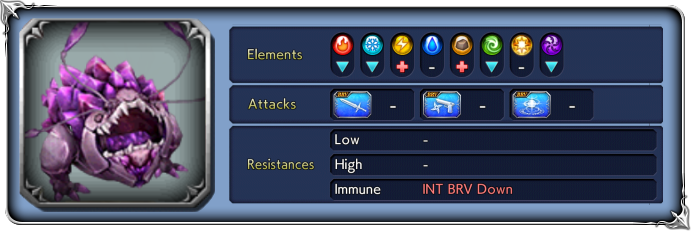
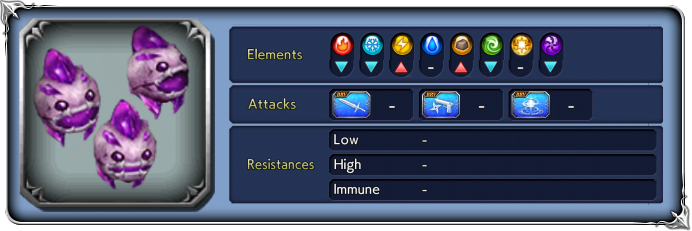
| Flash of Weakness | Lowers all enemies’ MAX HP; raises SPD |
| Tentacle | |
| Perforating Tentacle | |
| Mineral Thrust | “+” version: greater BRV increase |
| Sow Stones (free action after Mineral Thrust) | Summons Mite Eaters; restores 200k HP to any Mite Eaters still alive |
| High-Pitched Acoustics | |
| Sprinkle | “+” version: grants |
| Dance of Tentacles | Increases BRV when less than INT BRV; |
| Ground Claw | Increases BRV; |
| Absorb Energy (always preceded by “Seeking energy…”) | Increases BRV when less than INT BRV; absorb all enemies’ BRV; |
At wave start: Chaos aura grants 50% increase to SPD
“Mouth open wide…!”:(activates at 80% HP):
Aura changes to 30% increase to ATK, INT BRV, MAX BRV and 60% to SPD, lowers BRV damage taken by 30%
“Mouth open wider…!“: (activates at 50% HP):
Aura changes to 50% increase to ATK, INT BRV, MAX BRV and 70% to SPD, lowers BRV damage taken by 50%
Enrage: N/A.
This boss starts the wave using Flash of Weakness as an instant first action, severely reducing your teams’ MAX HP and increasing its own SPD by 50%. You can deny it this action by summoning right before the end of the previous wave. By doing so, you will have the chance to chain delays while the boss is still at lower SPD, getting extra free turns to deal damage before it finally has a chance to start acting.
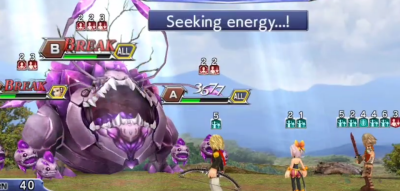
The main boss gimmick is Absorb Energy, an attack that will suck all of the current BRV from your party members and then spit it back as HP damage on everyone. The obvious ways to deal with it are by using HP damage mitigators (like the star of this banner: Basch) coupled with good healing, or by making sure your team has little or no BRV when the attack happens. Luckily, the boss is considerate enough to always warn you before using this attack. When the message “Seeking energy…!” appears on the screen, it will absorb energy on the next turn. Take this chance to either dump all of your BRV before it happens, or trigger your skills or AAs that will mitigate HP damage to help you survive the attack.
If you bring Warrior of Light (with the help of a good INT BRV buffer) or Nine, the boss will be unable to absorb your BRV, since the absorption hits the shields first. This will make the big attack mostly harmless.
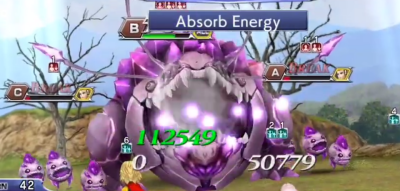
The Mite Eaters are minor nuisances with simple moves, but considering your reduced MAX HP and their constant HP attacks, be careful to no leave yourself open to a KO. The boss can frequently heal and/or revive them as a free turn after using Mineral Thrust, so you can either bring strong group damage to take them out quickly or just ignore them outright and focus all of your damage on the main boss – especially if you have defensive units to reduce their threat.
Since this is a telegraphed ![]()
![]() attack, our usual suspects Eald’narche, Arciela and Kefka can shut the boss down for a long time with [Terror] or [HP Attack Disable].
attack, our usual suspects Eald’narche, Arciela and Kefka can shut the boss down for a long time with [Terror] or [HP Attack Disable].
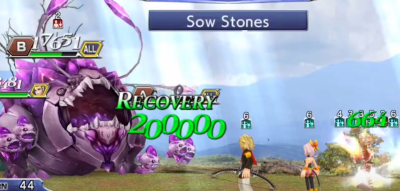
Speaking of damage on the boss, this horrid plant has a GIGANTIC amount of HP. No wonder, given Noctis and Vaan are boosted characters here. The fight is on the easier side, but make sure to bring good damage dealers with longevity, and don’t waste too much damage on the smaller Mites, or you might find yourself running short on skills to finish the battle.

DISCLAIMER:
Challenge quests are just a small bonus if you have already geared up the characters it asks for. If you haven’t, it is NOT worth pulling for a new character or spending ingots if you only intend to use them here. You can easily clear it with any team to get 400 gems and 3 tickets. The extra rewards for a Perfect complete with boosted characters are a measly 100 gems and 2% of a BT weapon. Not worth the hassle!
To make up for the utter bullshit that was Odin’s CQ, this one is completely trivial with the strong featured characters, especially if you bring Basch. It is only a matter of having them geared up enough to complete the challenge.
Gear Check: Noctis and Vaan are damage dealers, so they expect to have EX+3/3 and LD to perform well. Basch and Serah can make do with base EX or even 35CP only, as long as your other two characters make up for their lack of damage.
For a better idea of what team comps are able to complete this, check the Challenge Quest tab in the Call to Arms.
If you do try to go for a full complete (only boosted characters), here are some specific tips:

Noctis: With the “summon before the end of wave 1” trick, you can use his BT right after summon, followed by his LD, to extend that free damage window even further. Do your best to finish the first wave with full HP to trigger his Will of the Prince passive (either by making sure Basch acts before the Iron Worms, or bringing Alexander).

Basch: Extremely easy to play, he turns the fight into a cakewalk as long as you keep his shields up – if you have his LD, it’s almost impossible to die. Watch to not let his buffs drop. Do NOT bring Leviathan with him, the 6th framed buff will leave him without space for important buffs like the one from Noctis’ LD.

Vaan: Do Vaan things and melt the boss, just take care to use S2 or HP+ before the Absorb Energy attack to avoid feeding your refunded BRV to the boss.

Serah: Still a strong option while boosted, despite showing the age of her kit; her MAX BRV Down helps decrease the potential damage of Absorb Energy, and her group damage helps curb down the Mite Eaters.

