Mission Requirements:
Score 730k | Clear without any KOs | Clear within 110 turns | Take 32000 or less HP damage
Featured Characters: Shantotto, Ultimecia, Paine, Squall
Many team ideas with and without boosted characters are available in this event’s Call to Arms!
Fight Overview & Team building
Another boss event geared towards Magic damage, with a very tricky final boss that will nullify many of the cheaper tactics we have been using, like terror-locking, relying on Last Stand or evasion, or using enchant/imperil to completely ignore weapon type resistances; but there are good ways to deal with their deadly attacks if you read up on the strategy below.
Recommended:
- Gravity/True Damage for the last wave, or guaranteed Breaks (like Trey).
- Paralysis specifically (if not available, Silence effects or Delayers/Amidatelion)
- Debuffers are tricky to use, but can help a lot, especially if you stack 6 framed debuffs.
- Dispellers
- A Tank
- Party enchant/imperil
Avoid:
- Ranged or Melee attackers, because the first wave has a 75% PHY damage reduction that cannot be bypassed easily via enchant/imperil, since it is a buff and not an innate resistance. It is possible to work around it, but using Magic attackers is the easy solution.
Summon options:
- Any, depending on what is better for your team comp.
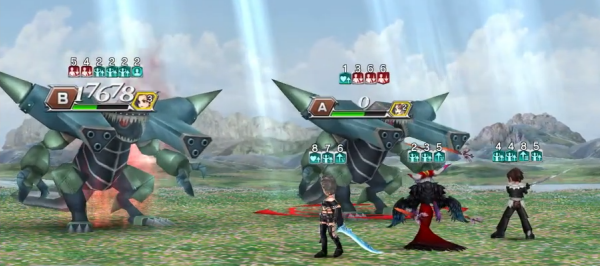
Wave 1: SAM08G x2
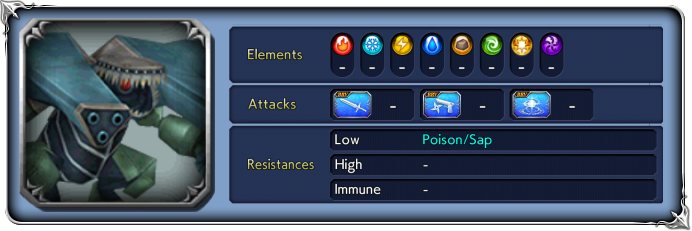
Base stats (courtesy of DissidiaDB):
Max HP: 1,300,000 | INT BRV: 4,200 | MAX BRV: 25,000 | ATK: 9,000 | DEF: 8,500 | SPD: 34 | Chase value: 30
| Rip | |
| BRV Attack | “+” version: stronger, and has a 30% chance of inflicting |
| Shoulder Charge | “+” version: stronger, and has a 30% chance of inflicting |
| Gatling Gun | “+” version: has a 30% chance of inflicting |
| Cannon Blow | “+” version: has a 10% chance of inflicting |
| Store | Free action; follow-up to any attack after [Gun Smoke] has expired increases BRV; grants |
At battle start: Chaos aura grants 50% increase to SPD
Loading ammunition…! (activates at 80% HP):
Aura changes to 20% increase to ATK/DEF, 30% to INT BRV, MAX BRV and 60% to SPD, lowers BRV damage taken by 30%
Loading a lot of ammunition…! (activates at 50% HP):
Aura changes to 30% increase to ATK/DEF, 50% to INT BRV/MAX BRV and 70% to SPD, lowers BRV damage taken by 50%
Enrage: No. You can kill one at a time without additional problems.
It may not be apparent from their stats sheet, but these enemies pretty much have 75% resistance against Melee and Ranged attacks most of the time. They are the main reason Magic attackers are preferred (but not mandatory) for this event.
They have a very predictable 3-turn cycle:
- Turn 1: they will use Gatling Gun to gain a :buff_heart: 3T BRV Regen, followed by a free use of Store to gain a lot of BRV and another 4 short duration self-buffs, including the framed PHY resistance.
- Turn 2: If their BRV is high enough, they will use Rip to deal HP damage. If not, they will use a “+” version of their basic attacks, adding a 30% chance to paralyze their target (10% for the
 attack). If you see a red aura on them, the next attack has a chance to paralyze.
 - Turn 3: If their BRV is high enough, they will use Rip to deal HP damage. If not, they will use a basic version of one of their attacks, with no chance to paralyze. Their 2-turn buffs will expire.
- Turn 4: repeat the cycle, starting from turn 1 and reapplying the buffs.
They have no BRV+HP attacks, so as long as you are able to shave down their BRV gains after each turn, they pose little threat. Watch out for the risk of having your best shaver paralyzed or delayed, or the Gun Powder Sap-like effect stealing too much BRV from your characters to them.
If you apply enough framed buffs, you can stop them from getting their strong self-buffs up, making the wave considerably easier. Dispelling is also a good option, but probably not worth spending your limited skill uses for that. This fight has a VERY generous turn limit, and you will need your strongest abilities for the next wave, so you can take your time here if needed.
Wave 2: Affect x2
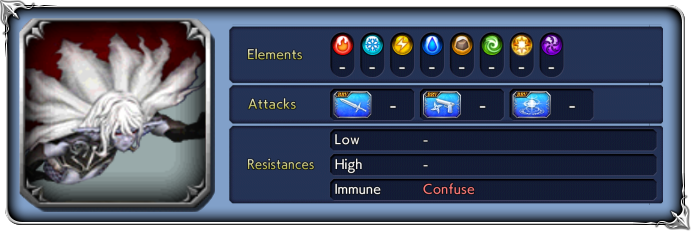
Base stats (courtesy of DissidiaDB):
Max HP: 3,500,000 | INT BRV: 4,500 | MAX BRV: 37,000 | ATK: 11,000 | DEF: 10,500 | SPD: 35 | Chase value: 40
| Dark | |
| Rip | |
| Banishing Gaze | |
| Evil Scratch | recovers from break; |
| Poison Nails | |
| Water Spread | |
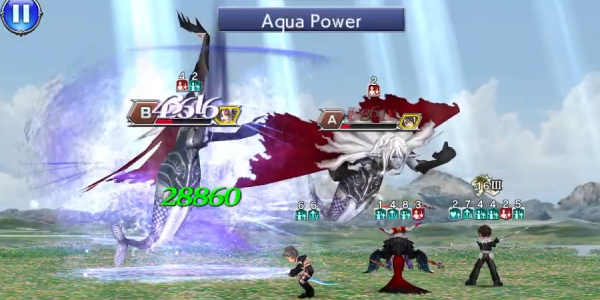
| Aqua Power | Cleanses own debuffs (frames excluded); increases BRV; grants gains 75% BRV damage reduction for 1 Turn (or until Broken); low turn rate; (while the Affect is under 50% HP, this can be used as a free action after its other basic attacks.) |
| Demonsplash | [always used after Aqua Power if the Affect has not been broken, or has recovered from Break when its turn comes] increases BRV; |
| Break | [always used after Aqua Power if the Affect is broken (and has not recovered from Break yet)] |
At battle start: Chaos aura grants 50% increase to SPD
Reaper Rise:(activates at 80% HP):
Aura changes to 30% increase to ATK, INT BRV, MAX BRV and 60% to SPD, lowers BRV damage taken by 30%
Reaper Rise+: (activates at 50% HP):
Aura changes to 50% increase to ATK, INT BRV, MAX BRV and 70% to SPD, lowers BRV damage taken by 50%
Enrage: No. You can kill one at a time without additional problems, but killing them in sync triggers fewer Aqua Powers.
The main threat from the Affects comes from their Aqua Power move. It will be automatically triggered when any of them hits 80% HP (“Reaper Rise” aura triggers) and again at 50% HP (Reaper Rise+), at which point both of them will target themselves. Their next move will be a self-buff that cleanses all non-framed debuffs and gives them a LOT of BRV (20k), 1T Elude (100% debuff evasion), and 75% BRV damage reduction (on top of the 30% BRV damage reduction they already have from Reaper Rise).
Their next attack will then be either:
- if they are not broken (or even if they have been broken, but recovered from the break): Demonsplash (BRV gain into huge BRV+HP damage on a single target, also removing all their buffs, even framed). Good news: this attack is usually targeted at your character with the highest HP. Bad news: it hits VERY hard and both Affects will usually act in quick succession, so even units with Last Stand will usually be killed by it.
- if they are currently broken: Break (a much less dangerous BRV attack, however it inflicts
 2T Stone on the target).
Dealing with Demonsplash is very tricky. You cannot simply rely on HP Attack Disable or other unframed debuffs, since they will cleanse before the big attack and gain 100% debuff evasion immediately after Aqua Power. You cannot rely on defensive buffs to protect the target of this attack either, since they remove ALL buffs before dealing damage.
The main way to survive is by breaking them after Aqua Power, forcing them to use Break instead. To do this, you have to make sure the Affect is broken when its turn comes. Even if you have broken the Affect after Aqua Power, if you allow 5 turns to pass and they recover from being broken, they will cast Demonsplash. This is a big issue if you are using characters with free turns like Ultimecia, Alisaie or Aphmau; make sure you don’t allow an Affect to recover right before its turn.
While Break is still a very bad attack (Stone will get one of your characters out of commission for a good while), it is preferable to, well, being dead. But forcing them to use it is not easy. The huge BRV damage reduction from Aqua Power makes it very hard to break them through normal means; unless you bring a team full of Boosted characters or stacking huge damage buffs and modifiers like enchant/imperil, Gravity/True Damage attacks or guaranteed Breaks from Trey/Caius are your best bet. A dispeller also helps by getting rid of the Elude so you can apply your debuffs again; a good unit with debuff evasion (like Aphmau or Lenna) can turn Break into a harmless attack. And if you cover them with 6 framed debuffs, they will be unable to gain the Elude debuff at all.
There is, however, a way to avoid this conundrum completely. If you Paralyze both Affects right before they hit the exact 80% mark, when they drop below 80% the Reaper Rise will trigger but they will NOT use Aqua Power. Terror (from Eald’narche), Turn Delays or Turn Deletion will not work; this requires Paralysis. Do it again right before the first of them hits 50% HP (Reaper Rise+), and you will completely skip the first two guaranteed uses of Aqua Power.
Unfortunately, on the latter half of the fight the triggers change. After dropping below 50% HP, Aqua Power will not give you a 1-turn warning with the Affects targeting themselves; instead, it will be a free action used after their other normal attacks. The best way to avoid it is by bursting them down within a Summon, and/or calling in an Amidatelion friend to delete all of their following turns and give you a long time to burn their health down without triggering the extra damage reduction.

DISCLAIMER:
Challenge quests are just a small bonus if you have already geared up the characters it asks for. If you haven’t, it is NOT worth pulling for a new character or spending ingots if you only intend to use them here. You can easily clear it with any team to get 400 gems and 3 tickets. The extra rewards for a Perfect complete with boosted characters are a measly 100 gems and 2% of a BT weapon. Not worth the hassle!
The Challenge Quest is identical to the Chaos fight, except for allowing no Friend use and needing a fully boosted team for the Perfect. It is basically a gear check to see if you have the appropriate weapons for the boosted characters, and if you don’t, it’s pretty easy to just get a non-perfect Clear and walk away with 500 gems and 3 tickets.
This fight has a very generous turn limit, and the second wave is infinitely harder than the first, so it is best to conserve skills at first and make sure you have most of your power available to burn the Affects quickly on wave 2. Since none of the boosted characters can heal, Alexander is a great summon option for the challenge quest.
Gear Check: Only Paine can be used as a budget character here, working even at base EX as long as you bring a purple Ultimecia with LD. Otherwise, this stage really asks for a full purple team with LDs (BTs are still optional, but make things much easier).
For a better idea of what team comps are able to complete this, check the Challenge Quest tab in the Call to Arms.
If you do try to go for a full complete, here are some character-specific tips:

Shantotto: Her LD is key to bypass the first two Aqua Powers, as explained in the main fight strategy. Save all uses for the last wave. Also make sure she is your highest HP character, since she has Last Stand to survive a Demonsplash if needed, and the other boosted characters suffer a lot more with the buff removal from that attack.

Ultimecia: The only source of gravity-based damage among these boosted units. Be especially careful because if you loop her EX+skills after Aqua Break, you may cause the Affects to recover from Break right before their next turn – and then they will use Demonsplash.

Paine: Her debuffs and auras make a huge difference in the fight, especially after the Affects get their second stats increase with Reaper+. Even though her personal damage will be rather low, the aura and debuffs will make your other team members perform much better.

Squall: The PHY resistance buff on the first wave will badly hurt Squall’s performance. You can spend one use of his LD at the start to help with the additional buffs, but try to save most of your Renzokukens for the last wave; they will be needed.