Mission Requirements:
Score 580k | Clear without any KOs | Clear within 95 turns | Take 32000 or less HP damage
Featured Characters: Squall, Auron, Cait Sith, Gilgamesh, Tifa, Steiner
Many team ideas with and without boosted characters are available in this event’s Call to Arms!
Fight Overview & Team building
Thankfully, this Raid is not as cruel as the one that started the EX+ era. Some of us still awaken in the middle of the night screaming about the evil tree from the Soulcage raid. This fight is heavily focused on Melee damage, but you can easily bypass that with one of the good enchanter/imperil units we got in recent banners. It’s a one-wave fight heavily centered on displaying the power of Squall’s new and shiny BT weapon, but in truth, it can be conquered by a huge variety of teams.
Recommended:
- High group damage. Splash damage is good, full group damage is even better.
- Party enchant/imperil if you want to bring non-melee units.
- HP attack disable is great, and as a bonus, also stops the Senescent Missiles.
- Debuffers, especially SPD Down and Turn Rate Down, to keep the multiple enemies under control.
- Healers and HP Damage Mitigators to deal with the frequent HP attacks.
- Trap-like effects, Counter Attacks, or characters who get free turns with enemy actions will love the 3 fast enemies here.
Avoid:
- Ranged or Magic attackers, if you don’t bring an enchanter.
Summon options:
- Leviathan or Shiva to help deal with the speedy enemies, or any other summon you prefer for your team comp.
Wave 1: Soul Cannon x1, Launcher x2
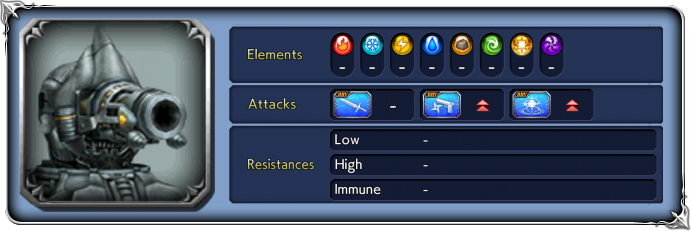
Base stats (courtesy of DissidiaDB):
Max HP: 5000000 | INT BRV: 4700 | MAX BRV: 40000 | ATK: 10500 | DEF: 15000 | SPD: 34 | Chase value: 9999 (cannot be launched)
| Wave Cannon | Cleanses own debuffs (except framed); increases BRV if below INT BRV; group ranged removes targets’ buffs (except framed); inflicts |
| BRV Attack | |
| Cannonfire | |
| Fusillade | “+” version: more powerful, also grants party BRV |
| High-Powered Cannon | “+” version: more powerful attack “++” version: even more powerful, also grants party BRV |
| Soul Laser: | “+” version: also increases own BRV “++” version: also grants party BRV |
| Armor-Piercing Beam | Recovers from Break; |
| Lost Control | Triggered when both Launchers are destroyed; raises ATK for 3 turns |
| Reactivate Launcher | Summons Launchers; cancels ATK boost from “Lost Control”. Happens automatically at 80% and 50% HP, or after Lost Control ends. |
Shots grown more powerful…! (activates at 80% HP):
30% increase to ATK, DEF, INT BRV, MAX BRV and 10% to SPD, lowers BRV damage taken by 30%
Shots grown even more powerful…! (activates at 50% HP):
50% increase to ATK, DEF, INT BRV, MAX BRV and 20% to SPD, lowers BRV damage taken by 50%
Enrage: No.

Base stats (courtesy of DissidiaDB):
Max HP: 800000 | INT BRV: 4300 | MAX BRV: 35000 | ATK: 12500 | DEF: 14000 | SPD: 36 | Chase value: 10
| BRV Attack | |
| Cannonfire | |
| Senescent Missile | Increases BRV if below INT BRV; |
| Secondary Gun | “+” version: also grants BRV to Soul Cannon |
Launcher revival mechanism:
● Upon hitting 80% HP, the Soul Cannon will revive any missing Launchers with full health.
● Upon hitting 50% HP, the Soul Cannon will revive any missing Launchers with full health.
● If at any point there are no Launchers active, the Soul Cannon will trigger “Lost Control” (raises ATK) for 3 turns. After the third turn, both Launchers will be revived with full health.
● When the Soul Cannon dies, any Launchers left will still have to be destroyed.
The Soul Cannon is immune to being launched, and the Launchers are immune to Paralyze. Apart from that, they are susceptible to all debuffs, and they are a good way to reduce the danger level of the fight.
With its recast ability (Wave Cannon), the boss will cleanse all non-framed debuffs from itself (but not from the Launchers) and remove all non-framed buffs from your team. Try to avoid being broken by the Soul Cannon, since a Break will fill its recast bar faster and force you to deal with this ability more often. Its other attacks are fairly tame in comparison, but watch out for the fact that both the Soul Cannon and the Launchers have attacks that feed BRV to each other, which means their BRV can reach high levels easily if you don’t keep them in check.
The Launchers’ most annoying attack is Senescent Missile, which inflicts ![]() 4T Old. This is a very unique debuff: it starts at I and increases one level for each action the character takes, and can go up to V. If the character is hit again by another Senescent Missile before it expires, the duration increases back to 4 turns. This debuff reduces ALL stats depending on the level (I = 10%,II = 20%, III = 30%,IV = 50%, V = 100%). If you find yourself stuck with a high level of [Old] at a bad moment, using your AA is a good way to skip a turn and get rid of it.
4T Old. This is a very unique debuff: it starts at I and increases one level for each action the character takes, and can go up to V. If the character is hit again by another Senescent Missile before it expires, the duration increases back to 4 turns. This debuff reduces ALL stats depending on the level (I = 10%,II = 20%, III = 30%,IV = 50%, V = 100%). If you find yourself stuck with a high level of [Old] at a bad moment, using your AA is a good way to skip a turn and get rid of it.
The main threat here comes from the constant barrage of attacks by the 3 enemies, along with the fact that you may end up having to waste a lot of damage destroying Launchers that will end up being revived anyway. A good way to kill as few Launchers as possible is to kill the first one after the boss has hit 80% HP (with the message “Shots grown stronger…“), and then whittle down the other one until the boss hits 50% HP (“Shots grown even stronger…“). Then you kill that one, and keep the new Launcher alive until the boss’ health is low enough for you to summon and burst it down.
If both launchers are killed at the same time, the boss will revive them after 3 turns, so by keeping one alive, you minimize the amount of revivals you have to deal with (and Launcher HP you need to chew through). It’s possible to kill only 2 Launchers with this strategy, while not having to deal with 3 enemies for the majority of the fight. Each additional Launcher that is revived adds another 800k HP that you need to deplete, so minimizing that makes this fight much shorter.
Another standout feature of this fight is the arrival of the BRV damage reduction auras. BRV hits will have their damage reduced by 30% when the boss falls below 80% health, and by 50% after the boss hits half health. Characters who were easily hitting the 9999 dmg before should not see much difference, especially if you bring strong enough auras and buffs; but characters who were already hitting below the damage cap will see their output reduced drastically, so make sure you build your team with this in mind.
Galuf cheeses this fight so hard, it’s not even funny. Practically all of the HP attacks are ![]() Melee, including the Senescent Missiles, which he will completely ignore. If you bring Galuf, you never even have to deal with the [Old] debuff. Other tanks and off-tanks can also do this job very well, even if they get hit by the debuff, turning the fight into a cakewalk. Just make sure you bring an enchanter/resist down character to get through the ranged and magic resistance.
Melee, including the Senescent Missiles, which he will completely ignore. If you bring Galuf, you never even have to deal with the [Old] debuff. Other tanks and off-tanks can also do this job very well, even if they get hit by the debuff, turning the fight into a cakewalk. Just make sure you bring an enchanter/resist down character to get through the ranged and magic resistance.
Eald’narche can also cheese this easily as long as you bring an enchanter.

DISCLAIMER:
Challenge quests are just a small bonus if you have already geared up the characters it asks for. If you haven’t, it is NOT worth pulling for a new character or spending ingots if you only intend to use them here. You can easily clear it with any team to get 400 gems and 3 tickets. The extra rewards for completing with boosted characters are a measly 100 gems and 2% of a BT weapon. Not worth the hassle!
The Soul Cannon and the Launchers have the exact same stats in the Challenge Quest as they had in the original version, except for one important difference. Instead of gaining the first aura at 80% HP and a stronger aura at 50% HP, this version gains no aura at 80% and gains the weaker aura at half health:
Shots grown more powerful…! (activates at 50% HP):
30% increase to ATK, DEF, INT BRV, MAX BRV and 10% to SPD, lowers BRV damage taken by 30%
Apart from that, the fight is identical, basically a gear check to see if you have the appropriate weapons. Since you can’t bring a tank or a strong healer, pay special attention to keep the enemies broken before their turn to avoid being overwhelmed by their HP attacks. Using the strategies outlined above to avoid having to kill a large number of launchers is very important!
If you have Squall’s full kit + BT, you can make do with two other 0/3 units, or even Cait with his 35CP only. With Squall’s LD, you can comfortably carry one non-puprle unit. Without his LD or BT, you will probably want a full purple team.
For a better idea of what team comps are able to complete this, check the Challenge Quest tab in the Call to Arms.
If you do try to go for a full complete, here are some unit recommendations:

Squall: The big star of the fight. The BT is completely optional, but the LD passive ability is heavily recommended. He will greatly help with shaving and dealing group HP damage.

Auron: Excellent, especially if you have his EX+3LB. His main contributions to the fight are the great INT BRV and MAX BRV debuffs, which make the Launchers deal much lower damage, the Melee Resist Down debuff to increase the damage of all other melee boosted characters, and the delays from his EX skill. Remember to reapply debuffs after the recast ability.

Cait Sith: The best healer among the boosted units. Also the only one… And a weak healer at that, but better than nothing! If you bring him, try to use Mog Dance after each recast, since it removes your non-framed buffs. His only reliable skill for shaving is the EX. Toy soldier exists mostly to reapply the PHY ATK Up buff.

Tifa: Very fast and high damaging, but sadly her launches will be wasted due to the main boss being immune to it. Her delay is still very useful.

Gilgamesh: strong BRV shaving and high damage, but not especially amazing for this fight. The Launchers are immune to paralyze, so save Death Claws for the Soul Cannon. You probably need him at EX+3/3 for this fight.

Steiner: A very good group damage dealer with a strong ATK Down debuff, but like Gilgamesh, he is not a very popular character in DFFOO, so the likelihood of having him built up is low. Can still do the job if you have him purpled!

