
How to access:
Clear all of the Event stages (except the Co-Op LV 70 stage, which is optional). This will give you access to the CHAOS stage.
Stage Difficulty: Level 180 (CHAOS)
Mission Requirements:
Score 620k | Clear without any KOs | Clear within 100 turns | Take 10000 or less HP damage
Featured Characters: Eald’narche, Garnet, Lann & Reynn, Aphmau
Many team ideas with and without boosted characters are available in this event’s Call to Arms!
Fight Overview & Team building
This fight has 3 trash waves at the beginning, followed by a very tanky wave with 1 main boss and 2 extra enemies (which can be revived after killed). Eald’narche makes it much easier due to his Terror and Warp debuffs, but it’s not a very hard fight as long as you bring a strong enough group damage dealer and good healing or defensive measures.
Recommended:
- High group damage. The final wave is very tanky and becomes much easier to manage if you kill the smaller enemies.
- Debuffers work very well, reducing the threat of the fight. SPD Down is especially recommended, to counteract the Rhinoceros Dance increasing the SPD of the main boss.
- Healers and HP Damage Mitigators are great defensive options against the frequent HP damage from the bees.
- Galuf is the cheapest way to cheese the fight if you don’t have boosted characters. Warrior of Light can also work with a proper support; all other tanks who rely on Lock are not recommended.
- Trap-like effects will be very effective against the fast-moving triple enemies in the last wave.
- Debuff evasion to avoid the Virus and Confuse debuffs, but it is not as necessary as in other debuff-heavy fights.
- Turn delayers can be great to allow big damage bursts after the Killer Bees are gone, but note that delaying won’t stop the boss from summoning them back, since it happens outside of its turn.
Avoid:
- Tanks who rely on inflicting the Lock debuff, because the boss specifically counters that.
- Characters with :light: Light or
 Dark elemental attacks, since the boss absorbs them. The Killer Bees are immune to
  Earth.
 - HP attack disable as a strategy… even if Kefka and Arciela are still very good characters for the fight, regardless.
Summon options:
- Avoid Diabolos and Alexander, since the last boss absorbs their elements. Brothers is usable, but the Killer Bees will take no damage from Earth-enchanted attacks.
Wave 1: Abaddon x2
Thes guys will try to inflict ![]() 3T Virus (lowers chance of gaining buffs). Kill them quickly to avoid it (but don’t waste skills, you will need them for the last wave), use some debuff protection, or make sure you have your important buffs up before that.
3T Virus (lowers chance of gaining buffs). Kill them quickly to avoid it (but don’t waste skills, you will need them for the last wave), use some debuff protection, or make sure you have your important buffs up before that.
Wave 2: Red Scorpion x1, Scorpion x2
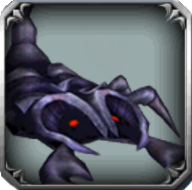

The Red Scorpion can also inflict ![]() 3T Virus, so make sure to focus it down first. The others have only regular poison.
3T Virus, so make sure to focus it down first. The others have only regular poison.
Wave 3: Gargoyle x2

An irrelevant wave, just make sure to conserve your skills for the main boss.
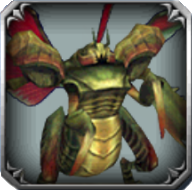
Wave 4: Aloof Horn x1, Killer Bee x2

| Rend | |
| Somersault | |
| Thundaga | |
| Group Thundaga | |
| Refect | |
| Confuse | |
| Bee Feedback | |
| Looking to move more quickly…! | Uses Beetle Knock next turn |
| Beetle Knock | |
| Swing Dive | Recovers from Break; |
| Horn Blight | Recovers from Break; “+” version: Increases BRV first, and is a much stronger attack |
| Raising a din…! | Happens outside its turn; Summons a Killer Bee; restores allies’ HP if allies present. |
| Readying for the kill! | Triggers if inflicted with Lock; repeats Horn Blight+ every turn after that |
Wings buzzing…!: Raises ATK, DEF, SPD, INT BRV, MAX BRV (activates at 90% HP)
Rhinoceros Dance: Raises SPD, DEF (activates at 65% HP)
Wings buzzing more…!: Raises ATK, DEF, SPD, INT BRV, MAX BRV further (activates at 65% HP)
Enrage: No. And the fight ends when the Aloof Horn is killed, as long as the bees have already been killed once.

| BRV Attack | |
| Rush | |
| Sting | |
| Stab | |
The real meat of the fight is the last wave, with a big boss and two additional enemies helping it. These have a large amount of HP, so be sure to bring enough firepower (especially AoE damage) to defeat them within the turn count.
The Killer Bees are a constant threat through the fight, and will be revived by the boss some time after being killed. Their ![]() Poison Sting deals HP damage, unlike regular poison. They are very fast, and if multiple enemies attack the same target, they can cause an easy kill. The boss also makes them more dangerous via some of his own attacks:
Poison Sting deals HP damage, unlike regular poison. They are very fast, and if multiple enemies attack the same target, they can cause an easy kill. The boss also makes them more dangerous via some of his own attacks:
- Refect feeds BRV to the bees and cleanses all of their debuffs, even framed. The boss tends to use it as its first action. That gained BRV can be converted into instant HP damage if the killer bees have a turn right after. It is not used very frequently, so debuffers can still be used well in the fight.
- Bee Feedback is a group attack that heals the bees and also grants a Shield (similar to Warrior of Light’s) to them, as well as the boss. This shield is not immensely strong – it absorbs less than 20k BRV – but it can prevent you from shaving BRV in time to avoid damage.
- Swing Dive is a strong single target BRV + HP attack that also gives
 ATK Up to any living bees.
The Aloof Horn also has some strong attacks that work regardless of having the bees alive. Confuse has a low chance to inflict that very annoying debuff; if the message “Looking to move more quickly…!” appears on the screen, it will use Beetle Knock (high turn rate) as its next attack, which means its follow up attack will come much sooner than you expect; and Horn Blight is a group BRV+HP attack than can seriously hurt if your team is broken by it.
Most tanks cannot be used for this fight, because inflicting Lock causes the boss to go berserk and spam Horn Blight+ every turn. Galuf does not depend on lock, however, and since most of the HP damage in this wave comes from melee attacks, bringing him makes your team practically immortal.
Since the main boss is immune to HP Silence, Arciela or Kefka cannot completely cheese this fight (but are still very strong units to bring). This is where the boosted unit Eald’narche shines, since his Terror debuff stops the enemies from acting if they are targeting ALL or him specifically.
If you don’t have Galuf or Eald’narche, make sure to have some way to protect the party from the constant damage in this wave. A combination of enough healing to survive it, debuffers to make the enemies hit for less, and damage mitigators like Porom or Hope, or any of the characters who can prevent HP damage or death like Beatrix, Seifer, Freya, etc should be enough. It’s important to not make your team too defensive, though, since the boss has so much HP to burn through.