Overview
This CHAOS stage gimmick revolves around the kit of Leo, Lilisette and Galuf. The battle is easier if you have a delay specialist (Leo) and a dodge tank (Galuf). Delay is highly recommended against the Demon Wall as the boss has a lot of tough hitting attacks.
Wave 1: Skull Wizard, Skull Dragon Soul
Use an AOE friend (e.g. Aranea, Emperor) if your party team comp consists of mainly single target attackers. Have someone with last stand passive to lock the Skull Wizard to him/her. The Skull Wizard’s Candle in the Wind always target the highest current HP unit. If a unit has a passive that depends on the units to max HP to trigger, make sure you get it trigger before fighting the boss. Galuf shines as a tank for his Cover + Blade Block Mechanic.
Target to finish within 35 turns.
Wave 2: Demon Wall
The Demon Wall has a lot of nasty attacks in its arsenal. The main thing to look out is the Recast ability – Crush which can destroy the party if you get BRV broken. Delay is the safest strategy if you don’t want to have anything to do the boss gimmicks. If you want to go through the boss gimmicks, be prepared for a rough ride. If your party has AOE specialist (e.g. Aranea), you could opt for General Leo friend. The recommended time to summon is when the boss HP is around 30% to 40%.
Although the turn count is 100 turns, it is pretty tight if you don’t have constant offensive power. Other than damage mitigation, debuffs to minimize the BRV gain is another alternative. Auras buffers like Lilisette helps to ensure constant damage for the boss fight.
Below is my team clears data for your reference.
| Event Synergy Galuf EX+0LB Leo EX+3LB Lilisette EX+3LB | Aranea Team Aranea EX+3LB Penelo EX+3LB Zack EX+3LB | Non-Synergy Zack EX+3LB Penelo EX+3LB Tifa EX+3LB | |
| Turns – wave 1 | 31 | 25 | 35 |
| Turns – wave 2 | 79 | 74 | 99 |
| Friend | Aranea EX+3LB (wave 1) | Leo EX+3LB (wave 2) | Aranea EX+3LB (wave 1) |
| Summon | Ramuh | Brothers | Ramuh |
| Video link | Click here | Click here | Click here |
For more team comps ideas, please refer to the C2A video list.
Enemy Analysis
Skull Wizard (Wave 1)

https://dissidiadb.com/bestiary/standard/284
The Skull Wizard is the one that you need to look out. It has a series of AOE BRV attacks (Group Darkra, Soul-Sucking Scriptures), ST BRV (Dark Awakening, Arcane Fingertips). If you don’t let it broken, there is a chance it will use Lifecut (ST melee HP)
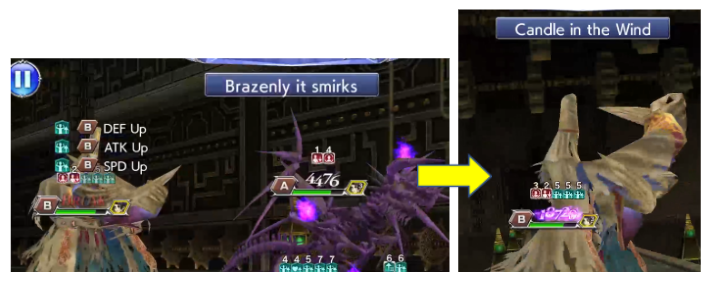
Skull Wizard will use the deadly Candle in the Wind (ST melee HP attack) on it’s next turn after it gains buffs via “Darkness falls” with “Brazenly it smirks”.
Methods to counter:
1) Manipulate the target lock
It will be an instant KO for a non-synergy unit unless the unit has a last stand passive. It will always target the highest current HP unit. Set your party’s HP so that the boss will target the specific unit you want to. (E.g. set Y’shtola’s HP to the highest if you want it to target her.)
2) Debuff it with ATK Down, Poison or Sap, INT BRV Down
All these debuffs will help to reduce the BRV gain that the Wizard gains before it unleashes its attack. Lilisette excels in this for her 20% Magic Atk and Sap debuff from her Sensual Dance.
3) Delay it before it gets a turn
The most popular strategy that most people use is delay. If the boss doesn’t get its turn, it won’t pose you a threat. I won’t suggest you do this because it is better to save the delay skills for the main boss.
Once you get hit for the first time, it will take 3-4 turns to use the Candle in the Wind. So make sure you heal up before the designated target gets hit again.
Skull Dragon Soul (Wave 1)

https://dissidiadb.com/bestiary/standard/148
Although it is not as annoying for the Wizard, it can gobble up BRV with Crushing Fangs (it will break any characters whose gimmicks are based shield or not getting broken). The dragon will use Soul Reverse which allows it to shift between magic and physical attacks. Under Soul Reverse, it will gain Magic Resist which is followed up by Soul Cry. When doing Soul Cry, it will cancel Magic Resist raises attack. In its subsequent uses, it will raise its PHY resist and lower MAG Resist.
When it uses Soul Cry, you will see fireballs surrounding it.

As long as you keep it broken, you won’t face the prospect of its Lunge (ST Melee HP attack). Overall, it is quite harmless vs. the Skull Wizard
Demon Wall (Wave 2)

https://dissidiadb.com/bestiary/standard/440
The boss is pretty tanky on its own and becomes very dangerous at the end of the battle.
It is immune to launches (with a Chase HP of 5,000). It absorbs Holy and Dark and strongly resist Magic for this stage.
The boss starts off 3/5 of its recast gauge filled. The gauge will fill up faster if it breaks a character. Avoid getting broken is important as you don’t want to avoid unnecessary BRV breaks. It will take the boss 2 turns to max it’s gauge for Crush/+.
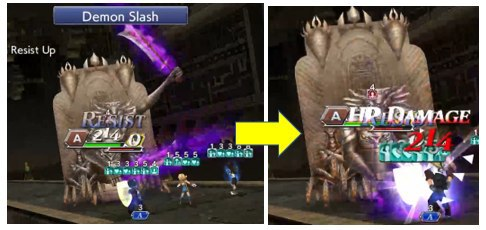
The boss’ second turn is the Demon Slash (which can dispel non-framed buffs) even if your character doesn’t get broken. This will be followed by its first Crush. After another BRV hit, it will go with Gathering Strength. Shave the BRV. If you are unable to shave the BRV, it will follow up with Butcher (ST HP attack) and the boss will gain 2.5 of its recast meter.
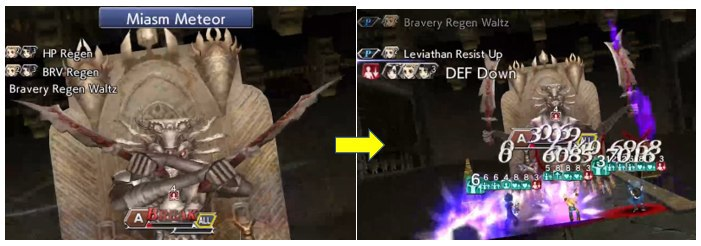
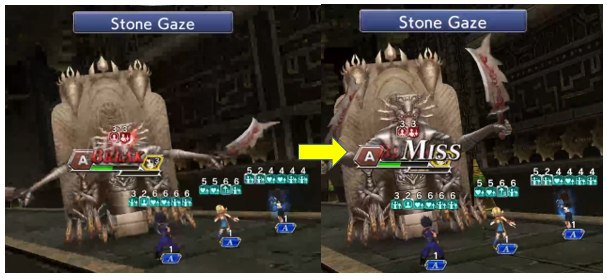
Hew is its next move which will inflict the INT BRV down debuff. If there are no breaks, it is only 1.5 of its recast meter. However, if it breaks a party member, it will bring its recast meter to max. It will also use Dark Energy which delays the target’s turn by 1. Do some breaks and bring your turn into the desired order. Sometimes if the boss gains 2 turns in a succession, it is advisable to delay so you minimize the damage potential. After 3rd recast, it will start to add Stone Gaze (petrify targeted unit for 1 turn) and Miasm Meteor (AOE BRV, with DEF Down debuff)
The recast gauge is filled with 5 points. After every Crush, the gauge will reset to 0.
| Move | Recast | Remarks |
| Demon Slash | +1.5, or +2.5 if it breaks | Dispel buffs, uses after its generic BRV (Dark magic). Strong versions after Demonic Impulse aura is activated. |
| Gathering Strength | +2.5 | Gains 50k+ BRV, party gains extra turn. Follow by with Butcher, if not broken. |
| Hew | +1, or +1.5 if it breaks | AOE BRV hits with INT BRV down debuff, use after 80% threshold |
| Dark Energy | +1, or +1.5 if it breaks | ST Dark BRV, delays target by 1 turn (even not broken) |
| Stone Gaze | 1.5 | Petrify target for 1 turn. Use it after 2nd Crush+ |
| Miasm Meteor | 2.5, or 5 if it breaks | AOE BRV, DEF Down debuff. Use it after 3rd Crush + |
It will gain auras (Demonic Impulse when its HP falls below 80% and Demonic Impulse + below 50%)
With Ramuh blessing and no BRV breaks, Crush allows the boss to deal 15k to the party (5k per ally) while Crush+ deals 30k+ to the party. (7.5K per ally)
Demon Slash: Recovers from Break; melee BRV attack + HP attack. It can dispel non-framed buffs. So remember to get the character’s buff back up after the mentioned character receives this attack.
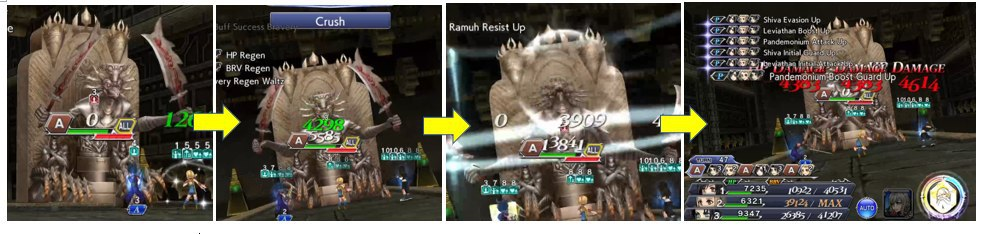
Crush/+ (the + variant is strong version): Crush: Recast ability; increases BRV; group melee BRV attack + HP attack. Remember to heal up.
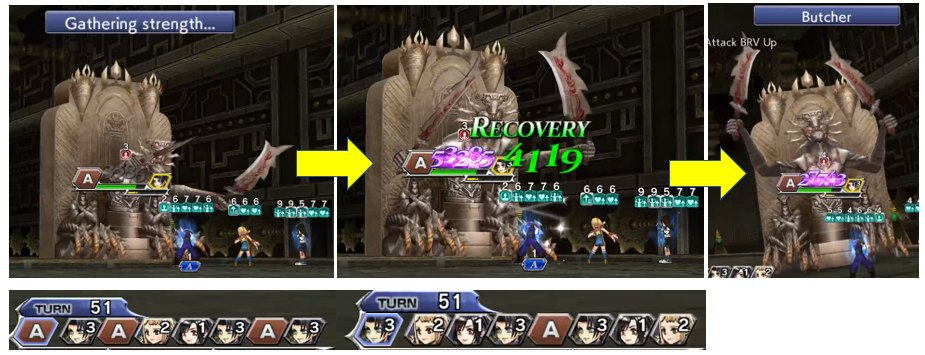
Gathering Strength: Massively increases it BRV. Shave the BRV! The boss will get SPD Down which allows you to have an extra turn to shave the BRV.
If you didn’t manage to shave it, you will get Butcher’d (My Zack is alive. So no worries 😊)
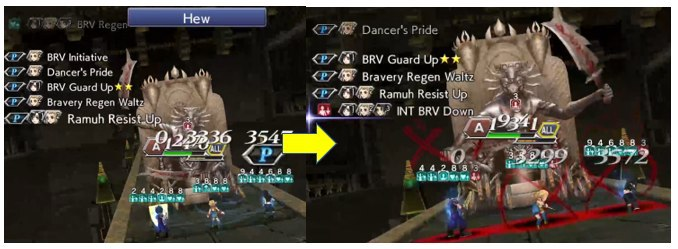
Hew: Group melee BRV attack; inflicts INT BRV Down
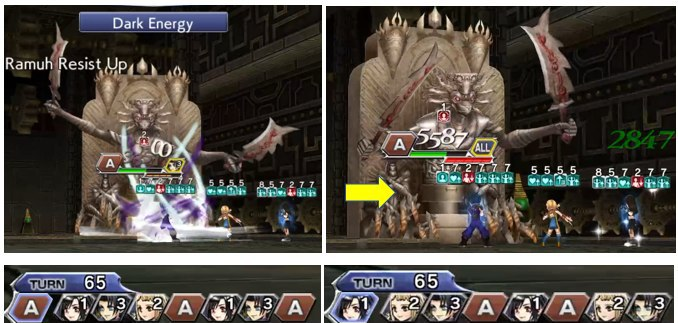
Dark Energy – Dark magic BRV attack; delays target 1 turn
Stone Gaze: Magic BRV attack; inflicts Stone for 1 turn
Miasm Meteor: Group magic BRV attack; inflicts DEF Down