Page Contents
‾‾‾‾‾‾‾‾‾‾‾‾‾‾‾‾‾‾‾‾‾‾‾‾‾‾‾‾‾

These guides are only released at least one day after the event has launched, because they are based on first-hand experience from testing and beating the fight with different team comps and strategies. And that takes a good amount of time!
If you would like to help support the effort put into creating this content, please consider becoming a patron. 
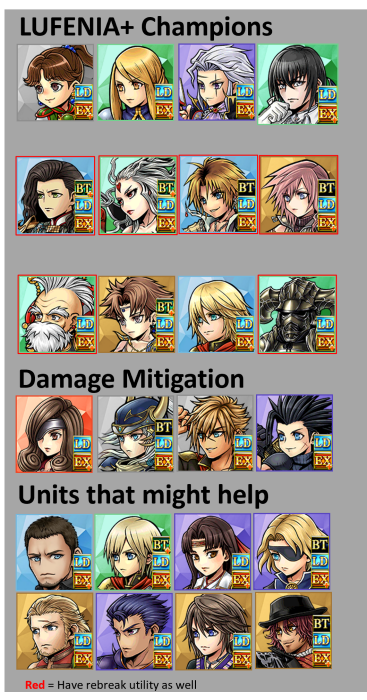
📝 Recommended Characters
📝 Wave 1: RAFFLESIA x2
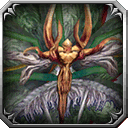
Rafflesia
HP: 12,000,000
Elemental modifiers: None
Type modifiers: None
Debuff immunity: None
Full information on Dissidia Compendium
 Lufenia orb
- Appears at 79% (count: 10)
- Never disappears
- Increases by +4 (limit: 10) when that boss is inflicted with Break
- The orb conditions requires you to inflict break the enemy constantly on the bosses. Units that inflict instant breaks or rebreaks (Vayne S2, CoD’s LD, Strago’s LD) are very useful here. The orb is a tight one and the bosses have high DEF auras activated at the start of the fight. Keep the boss BRV gains low and save a rebreak skill for when you need to refresh the counter.
 Boss Mechanics
Lufenia Auras

- This is yet another Luf+ boss who starts out the fight with a DEF +200% aura and huge BRV dmg/gain reductions, making it very important to bring strong DEF down debuffs and/or recently upgraded support units – especially if they have a good BT+ aura effect – to make sure your characters are able to deal good enough damage with their attacks.
“When the player acts 12 times in a row, the turn rate of Rafflesia will be instant!”
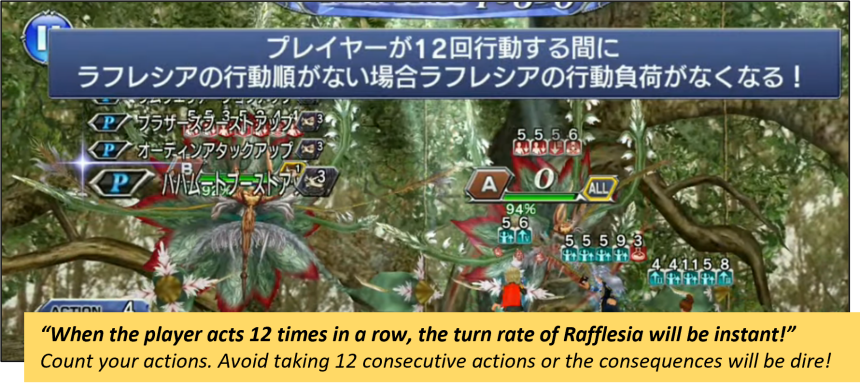
- If you trigger the condition, the boss will take its turn right after your unit ends its action, and also cleanse all debuffs (even framed ones). It will be a disaster if the orb counter is low. The real challenge on the fight is pacing the use of your skills.
- A whole Burst phase counts as only 1 turn, and Summon phase does not count at all, so don’t be afraid of using them when needed.
- Call Assists and instant/free turns outside of burst or summon still count as 1 action.
- Try to break the boss out of order so that you don’t push their turns too far. Off-turn damage (Cloud of Darkness’s BT, traps, counters) will help a lot.
- Another option is disabling their turns with framed debuffs so they act but don’t hurt you. Ramuh summon is a popular option.
- Do note the turn limit for this fight is very low, so you need to bring good damage.
Concentration mode -> Toxify
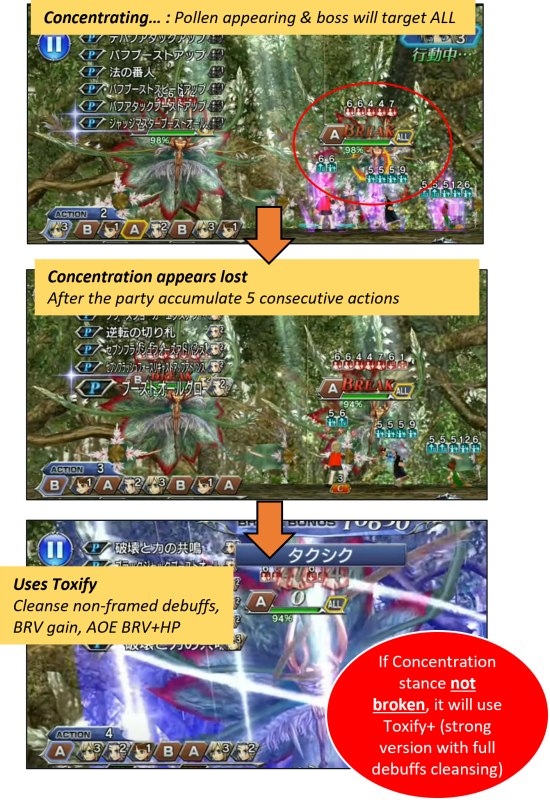
- Throughout the fight, the boss will enter into Concentration Mode (pollen). Boss A will enter into Concentration mode after its first turn, and they will alternate turns getting into Concentration mode after each one finishes.
- The aura ends after 4 actions (it also counts actions taken by the other enemy).
- If you don’t get the boss out of the Concentration aura, they will cleanse all debuffs and use Toxify+ (200% INT BRV Gain followed by 100% guaranteed hit AOE BRV+HP attack). Breaking their concentration will result in the boss using Toxify instead.
- Even if you remove the aura, Toxify (non-plus version) still cleanses all unframed debuffs and deals strong group damage via BRV gains. Bringing some form of healing really helps with this.
⚔️ Call to Arms

Find videos and team ideas here
🎬 Video demonstration
📋 PDF Guide
💪 Credits
This guide was written by DFFOO GL SO (ScottOng11). Follow his youtube channel for a crazy amount of runs in every event!
The fight mechanics infographic comes from Xcaliblur, who also has an amazing channel full of videos destroying Lufenia fights!